Sunday, 22 May 2011

SAH 170...

With the rain about today, I decided that I would sit & attempt a couple of challenges.  This one is from Stamp-a-Holics which I have done before.  It looked too easy not to attempt & upon seeing the sketch, though immediately of "Circle Circus".  I love this set & can't seem to get enough of it.  I've also used colours that are not me, but they just sort of jumped into my hands.

Now one of the conditions for this Sketch Challenge is - A card must be completed in 15 minutes or less.  Yep, I had 68 seconds left.  Boy, does the time fly when you are having fun.


Base Card - Whisper White - 5 7/8" x 4 1/8" or 15cm x 10.5cm - Score & Fold in half
Layer 1 - Old Olive - 5 3/4" x 4" or 14.5cm x 10cm - Cut from bottom about 1".  This allows you to attach the Basic Black Scalloped Edge
Layer 2 - Basic Gray - 4 1/2" x 1 1/2" or 11.5cm x 4cm

I punch an edge along a scrap piece of Basic Black Cardstock & layered it along the bottom half of Old Olive Cardstock.  I adhered the other half of Old Olive across the top of the Basic Black.

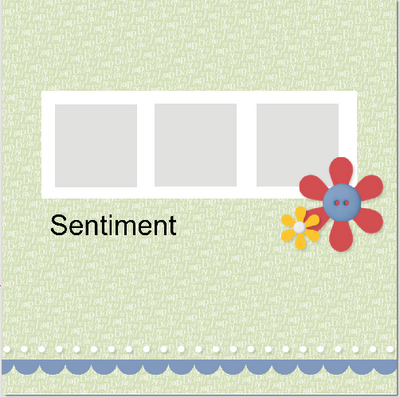
I punched 3 Whisper White squares & stamped them randomly using different images & Olid Olive, Basic Gray & Basic Black Inks.  These were adhered to the Basic Gray Cardstock, ensuring that they were placed evenly.This was then adhered to the Olive Olive Cardstock.

I stamped the sentiment directly onto Old Olive Cardstock using Basic Black Marker.  I then drew a couple of scriggley lines under the sentiment using my Basic Black Marker.

I again stamped 2 images onto Whisper White Cardstock, one in Old Olive Ink & the other using Basic Gray Ink.  I punched these images using 2 punches & adhered to the card.

The whole card was then adhered to the Base Card - Whisper White.  I drew white dots in the middle of the scalloped edge to lift it a little using my Gel Pen.

Supplies -
Stamp Set - Circle Circus, A Word for You
Ink - Basic Gray, Old Olive, Basic Black
Cardstock - Whisper White, Basic Gray, Basic Black, Old Olive
Punches - 1 1/4" Circle, 3/4" Circle, Scallop Edge, 1 1/4" Square
Accessories - Snail Glue, Gel Pen, SU Markers

As I said 68 seconds left.  A great male's card.

Thank You...

What started out with different size punches in my hand has turned into a Thank You Card for the lady who did the Puppy School which my new addition - 4 legged type - attended.  Belle began Puppy Scool wanting to be "Boss Lady", but was soon put in her place by another little "Boss Lady"  This is her card from Belle.

Base Card - Early Expresso - 5 7/8" x 4 1/8" or 15cm x 10.5cm - Score & Fold in half
Layer 1 - Blushing Bride - 5 3/4" x 4" or 14.5cm x 10cm
Layer 2 - Whisper White - 5 5/8" x 3 7/8" or 14cm x 9.5cm

I punched different size circles using my punches & Early Expresso Cardstock & Blushing Bride Cardstock & randomly adhered the circles to Whisper White Cardstock.  I run the Whisper White through the Bigshot using an Embossing Folder.

This piece was adhered to Blushing Bride before being attached to the Base Card - Early Expresso.  I stamped "Thank You" onto a piece of Whisper White, punched out & inked the edges in Early Expresso Ink &adhered to the card. 

I run 2 pieces of Blushing Bride Cardstock through the Bigshot using Embosslit Dies.  The Butterflies were then attached to the top of the card, including over the edge of the sentiment.  I added Basic Rhinstones to the middle of the Butterflies.

All in all, a very simple little card but I am quite taken with the end result!

Supplies -
Stamp Set - Short & Sweet
Ink - Early Expresso
Cardstock - Whisper White, Early Expresso, Blushing Bride
Punches - Modern Label Extra-Large, 1/2" Circle, 3/4" Circle, 1/6" Handheld Circle
Embossing Folder - Square Lattice
Embosslet Die - Beautiful Wings
Accessories - Multipurpose Glue, Basic Rhinestones


Until next time, Enjoy!

Saturday, 21 May 2011

SSC 204...

While all my craft stuff is out & about - usually spread over 2 rooms - thought I would give the challenge over at Stamping 411 a go.  I haven't done one of these for quiet some time.  Mind you, I am still tossing up about this card.  I think it may be the colours, as I find it very hard to get my head around these colours.  In saying that, I think it would make for a great girl's card!

Once again Stamping 411 have done all the measurements required for this card.  Don't you just love that?

Layer 1: 5-1/2 x 8-1/2", scored at 4-1/4" and folded in half - Rose Red

Layer 2: 4 x 5-1/4" - Very Vanilla & DSP
Layer 3: 3 x 3" square, tilted a bit - Pumpkin Pie & Very Vanilla
Layer 4: 3 x 3" (or other shape) - Rose Red & Very Vanilla
Don't forget your ribbon/bow combo!


I randomly stamped flower images using Rose Red Ink & Pumpkin Pie for the Butterfly images onto Very Vanilla.  I run the Very Vanilla through the Bigshot using an Embossing Folder.  The DSP was then adhered to the bottom of the card.  I adhered Taffera Ribbom along where the 2 textures meet.

Using Pumpkin Pie Ink, I randomly stamped the flower images & the verse using Rose Red onto the Very Vanilla square & ahered it to the Pumpkin Pie square.  I then stamped a small butterfly onto a spare piece of Very Vanilla using Rose Red, cut it out & set it aside.  I repeated the same with larger butterfly image, except I punched an image using my Punch

Using Pumpkin Pie Ink, I stamped the words onto the 2nd piece of Very Vanilla, Butterflies & flowers images were stamped using Rose Red Ink.  I then adhered the spare butterfly images over the top of the images on the Very Vanilla Cardstock & attached over the top of the 1st square.  The whole lot was then adhered to the Base Card - Rose Red.

To pick the look up & to give it a little bit of depth, I added Rhinestones to the centre of the flowers - gotta love these Rhinestones....  I tied a bow & adhered to card.

Supplies -
Stamp Set - Flight of the Butterfly
Ink - Rose Red, Pumpkin Pie
Cardstock - Very Vanilla, Pumpkin Pie, Rose Red
DSP - Sweet & Sour Speciality
Punches - Butterfly
Embossing Folder - Square Lattice
Ribbon - Taffera - Pumpkin Pie
Accessories - Multifpurpose Glue, Snail Adhesive, Bigshot, Basic Rhinestones

Until next time, Enjoy!

Best Wishes...

I've been trying to do a couple of different folds for cards.  This is a normal fold, but with the top showing a little of the inside.

Front -
Card Base - Rose Red Cardstock - 5 7/8" x 4 1/8" or 15cm x 10.5cm. Score & Fold in half
Layer 1 - Daffodil Delight Cardstock - 5 1/8" x 4" or 13cm x 10cm.  Front only - Measure & cut 1/2" or 2cm from top of card - as per photo
Layer 2 - DSP - 5" x 3 7/8' or 12.5cm x 9.5cm
Layer 3 - Tempting Turquoise Cardstock - 2" x 4" or 5.5cm x 10cm
Layer 4 - Daffodil Delight Cardstock - 2 1/2" x 2" or 6.5cm x 5cm
Layer 5 - Whisper White Cardstock - 2 3/8" x 1 7/8" or 6cm x 4.5cm

I punched the edge of Tempting Turquoise using the Edge Punch & adhered this piece to the DSP before adhering to Daffodil Delight Cardstock.  I tied a piece of Satin Ribbon along the top edge of Tempting Turquoise & tied a bow on the RHS.  I then adhered the whole lot to the front of the Base Card.

I stamped my sentiment directly onto Whisper White Cardstock using Basic Black Ink & adhered to the Daffodil Delight Cardstock, prior to adhering to the front of the card.

I adhered a button to small flower & adhered to bottom of card.  I then adhered small flower to a larger flower & placed over the punched leaves.  I then stuck a bigger button to the centre. 

Inside -
I run a piece of Daffodil Yellow Cardstock through the Bigshot using an Embossing Folder.  This was adhered to the inside of the base card.  I cut a piece of Whisper White Cardstock & adhered this piece to the Daffodil Yellow.  I cut & punched the edge of a piece of DSP & adhered to the bottom of Whisper White Cardstock.

To finish off, I added 3 Basic Pearls top RHS of card.

Supplies -
Stamp Set - Short & Sweet
Ink - Basic Black
Cardstock - Rose Red, Whisper White, Daffodil Delight, Tempting Turquoise, Old Olive
DSP - Island Oasis
Punches - Eyelet Border, 2-Step Bird Extra-Large
Embossing Folder - Perfect Polka Dots
Ribbon - Satin - Daffodil Yellow
Accessories - Multipurpose Glue, Snail Adhesive, Bigshot, Basic Pearls
Non-SU - Buttons

Until next time, Enjoy!

Wednesday, 18 May 2011

Accordion Card...

The person I have made this for doesn't like bling, busy, but just simple & plain, so this is what I come up with.

These cards have been around for sometime, but as usual I didn't chase any instructions to make mine.  Instead, I did mine to suit the Aust standard envelopes.  To ensure it still fitted into the envelope, I didn't want to put too much onto the card & bulk it up.

It is my first time at making an "Accordion Card", so hopefully you will be able to understand my instructions.  I've discovered they are very easy to make & a lot of fun embellishing.

Front -
I adhered Real Red Cardstock to the Base Card, applied DSP to the bottom, stamped the image directly onto Very Vanilla Cardstock using my SU Markers.  I then adhered this piece to Daffodil Delight Cardstock before adhering to the base.

Inside 1 -
Left Hand Side - I adhered DSP to Pear Pizzazz Cardstock & stuck this to the base card.  I then stamped the greeting using Real Red Ink onto Very Vanilla Cardstok, adhered it to Chocolate Chip Cardstock & then to the DSP.

Right Hand Side - Prior to adhering the 2 base cards together, I cut an oval out of the Chocolate Chip Cardstock, stamped the image onto Very Vanilla Cardstock using my SU Markers.  I cut a smaller oval of Real Red Cardstock & adhered it to the back of the Chocolate Chip.  I then adhered the Very Vanilla Cardstock to the back of the Real Red Cardstock.  The whole lot was then adhered to the smaller card to form the accordion.  I applied a Basic Pearl to the centre of the flower.  When adhering, ensure that you have your Valley, Fold, Valley.

I punched 4 corners using my Corner Punch - 2 in DSP & 2 in Very Vanilla Cardstock.  These were adhered to the card as per photo.

Inside 2 -
Left Hand Side - I cut a piece of DSP & adhered it to the base card.  Very easy as I didn't want anything else on this.  I will type & print a verse out to adhere here prior to posting.

Right Hand Side - I punched 2 corners using the Corner Punch - 1 in DSP & 1 in Chocolate Chip Cardstock.  These were adhered to Very Vanilla Cardstock which had been adhered to the Chocolate Chip base.  I punched a strip of Real Red with Border Punch and a strip of DSP using the same punch.  These were adhered to the bottom of the Very Vanilla Cardstock.  I stamped the 3 flower images directly onto the Very Vanilla Cardstock using Real Red Ink.  I applied 3 Basic Peals to the centre of the flowers.

Once folded, I adhered a piece of ribbon to the front, ensuring it wrapped around the whole card & tied a bow at the front.


Supplies -
Stamp Set - Friends Never Fade, Blessed Mother
Ink - Real Red
Cardstock - Chocolate Chip, Pear Pizzazz, Daffodil Delight, Very Vanilla
Punches - Corner Punch, Eyelet Border
Ribbon - 1/2" Stitched-Poly - Pear Pizzazz
Accessories - SU Markers, Basic Pearls, Multipurpose Glue, Snail Adhesive

Instructions -
Card 1 - Chocolate Chip Cardstock - 3" x 4 1/8" or 9cm x 15cm - Score in middle & fold
Card 2 - Chocolate Chip Cardstock - 10.5" x 4 1/8" or 27cm x 15cm - Score @ 3 1/2" x twice or 9cm twice
Adhere Card 1 to Card 2 ensuring that you have a Valley, Fold, Valley
Embellish card to complete

Until next time, Enjoy!

Saturday, 14 May 2011

Iris Folding...

I "googled" Iris Folding to find this card by Jennifer Thomas.  It looked too easy to be possible, but decided to give it a go.  Surprise, Surprise!  It was a great little fold.

Base Card - Very Vanilla - 5 7/8 x 4 1/8" or 15cm x 10.5cm
Layer 1 - Cherry Cobbler - 5 3/4" x 4" or 14.5cm x 10cm

Using a pencil & ruler, I measured the middle of the Cherry Cobbler Card & placed the pattern square in the middle.  I then used my Square Punch to punch the centre.  Once completed, the Iris Pattern was placed in the middle with a small piece of sticky tape.

I cut 2 long strips of DSP, folded in half lengthways, opened & adhered together.  I repeated this step for the 2nd piece of DSP.

I then followed the pattern with my DSP pieces, cutting & sticking the ends down as I went along.  The end result is a lovely little centre piece for stamping an image.

I punched Very Vanilla Cardstock using the Square Punch.  I stamped a couple of images onto Very Vanilla using Cherry Cobbler Ink.  I adhered this to the centre of the Iris Fold.

I placed a piece of Lace Trim Ribbon towards the bottom of the Cherry Cobbler & tied a bow.  I stamped the sentiment using Basic Black Ink, punched out with Oval Punch & stamped a couple of flower images onto the same piece as the sentiment.  This was adhered to a piece of Basic Black Card which had been punched using the Large Oval Punch.

I adhered the Cherry Cobbler to the Base Card - Very Vanilla Cardstock, applied Basic Pearls to the flowers & the corners of the square.

Supplies -
Stamp Set -Silhouette Sentiments
Ink - Cherry Cobbler, Basic Black
Cardstock - Very Vanilla, Cherry Cobler
DSP - Love Letter
Punches - 1 3/4" Square, Large Oval, Oval
Ribbon - Crochet Trim - Chantilly
Accessories - Multipurpose Glue, Snail Adhesive, Basic Pearls
Non-SU - Sticky Tape, Ruler, Pencil, Rubber

Until next time, Enjoy!

Wednesday, 11 May 2011

TSSC 173...

Today's card is inspired using the Colour Inspiration from Stamping 411 which was taken from the colours of this lovely dress.  Isn't it gorgeous!  The colours suit SU colours perfectly.
The sketch is taken from Mary-Jo's Challenge found on this blog - Technostamper

Base Card - Tempting Turquoise - 5 7/8" x 4 1/4" or 15cm x 10.5cm
Layer 1 - Whisper White - 5" x 3 1/4" or 13cm x 8.5cm
Layer 2 - Pear Pizzazz - 4 7/8" x 3 1/8" or 12.5cm x 8cm

I run the Pear Pizzazz Cardstock through the Petals A Plenty Embossing Folder.  This was layered to Whisper White Cardstock.  I adhered Whisper White Taffeta Ribbon across the bottom, tied a bow & attached it to the base card - Tempting Turquoise.

For my circle, I punched a circle in Whisper White, sponged Tempting Turquoise & Pear Pizzazz Inks to the Whisper White using my SU Sponges.  I then stamped the image in Versamark & heat embossed using Black Embossing Powder.

I punched another circle using Whisper White, adhered it to the smaller circle & attached to the card.

All in all a very simple, but clean card. Again, no sentiment.

Supplies -
Stamp Set - Just Believe
Ink - Versamark, Tempting Turquoise, Pear Pizzazz
Punches - 1 3/4" Circle, 1 3/8" Circle
Ribbon - 3/8" Taffeta Ribbon - Whisper White
Accessories - Multipurpose Glue, Snail Glue, Bigshot, Heat Tool, Embossing Powder - Black, SU Sponges

This is a Blog Hop, so be sure to check out the other cards you find below, by clicking directly onto the card.  You will be taken to their blog.


Until next time, Enjoy
 

Tuesday, 10 May 2011

CCMC 149...

Yes, another posting & another challenge.  You may need your sunglasses for this one.  When I saw the challenge, I wanted to use the DSP - Sweet & Slumber, while at the same time using Basic Black Cardstock.

This challenge comes from Create with Connie & Mary  Why not hop over & have a go yourself!

Base Card - Basic Black - 5 7/8" x 4 1/8" or 15cm x 10.5cm - Score & Fold in half
Layer 1 - Daffodil Delight - 4 1/2" x 3 1/2" or 11.5cm x 6.5cm
Layer 2 - DSP - 4 3/8" x 3 3/8" or 11cm x 6cm
Layer 3 - Tangerine Tango - 3" x 2 3/8" or 9cm x 6.5cm
Layer 4 - Whisper White - 2 7/8" x 2 1/4" or 8.5cm x 6cm

I randomly spread Shimmering Paint - Frost White over the Whisper White Cardstock & allowed to dry.

Prior to adhering DSP to my Daffodil Delight Cardstock, I punched corners of both pieces using my Corner Edge Punch.  This was adhered to the Base Card, as per the sketch. 

Using Tangerine Tango & Daffodil Delight Inks & SU Sponges, I sponged over the top of the Shimmer Paint.  I stamped the butterfly image using Basic Black Ink.  This was adhered to Tangerine Tango & then to the card.

I cut a small piece of Daffodil Delight Cardstock & punched one side using my Scallop Edge Punch.  I then attached Basic Black Grosgrain Ribbon along the middle of this piece & tied a bow prior to adhering to the card.

Again, I have no sentiment.  I find this sometimes covers a lot of occasions.
Supplies -
Stamp Set - All a Flutter
Ink - Basic Black, Daffodil Delight, Tangerine Tango
Cardstock - Whisper White, Daffodil Delight, Basic Black, Tangerine Tango
DSP - Sweet & Sour Speciality
Punches - Scallop Edge, Corner Edge
Ribbon - Grosgrain 1/4" - Basic Black
Accessories - Multipurpose Glue, Shimmer Paint - Frost White, SU Sponges

Until next time, Enjoy!

Sunday, 8 May 2011

Special Card...

Today just happens to be Mother's Day, so to all those mums out there - "Happy Mother's Day!". 

I've made this card for a special aunt & will post it this arvo, although I must admit it will be a day late, but you know the old saying "Better late, than never"

For my card, I've taken the sketch from Clean & Simple Stamping  It also qualifies for my group's weekly challenge, I think!

Group's Weekly Challenge # 119 -   Focusing on Embellishments.  We must have at least 3 emblishments on our project.

Base Card - Concord Crush - 5 7/8" x 4 1/8" or 15cm x 10.5cm - Score & fold
Layer 1 - Blushing Bride - 5 3/4" x 4" or 14.5cm x 10cm
Layer 2 - Concord Crush - 4 5/8" x 3" or 11cm x 7.5cm
Layer 3 - Blushing Bride - 4 1/2" x 2 7/8" or 10.5cm x 7cm
DSP - 1 3/4" x 2 7/8" or 4.5cm x 7cm

I stamped the Blushing Bride Cardstock randomly using Blushing Bride Ink & my flower image & adhered it to the base card.

I randomly rubbed Shimmer Paint over the Blushing Bride Cardstock & heat embossed Clear Embossing Powder for the flower outline.  I used Versamark & Basic Gray Ink for the flower outline.  I repeated the same process for the sentiment.  I then adhered the DSP to the bottom half of the card piece.

I added the Brad to the middle of the Ribbon prior to adhering this to the top of the DSP.  I adhered Blushing Bride Cardstock to Concord Crush & adhered the whole lot to the Base Card.

Wanting to make the card "pop" a little more, I added 3 small Basic Pearls to the top RHS, bottom LHS & bottom RHS of the card.  I also decided to add one to the middle of the brad.  I used Crystal Effects to adhere the pearls.

Supplies -
Stamp Set - Great Friend, Fifth Avenue Floral
Ink - Basic Gray, Versamark
Cardstock - Concord Crush, Blushing Bride
DSP - Lap of Luxury
Ribbon - 1/2" Stitched-Poly - Concord Crush
Accessories - Crystal Effects, Snail Glue, Embossing Powder - Clear, Brad - Pretty in Pink, Shimmer Paint - Frost White

Until next time, Enjoy!


LinkWithin

Related Posts Plugin for WordPress, Blogger...