Showing posts with label Perfect Punches. Show all posts

Wednesday, 2 January 2013

Flower Fancy....

I must apologise if I have case'd this card from someone as I am not too sure.  Please do let me know if you recognise it.  It was one we did way back in July of this year.  Where does the time go?
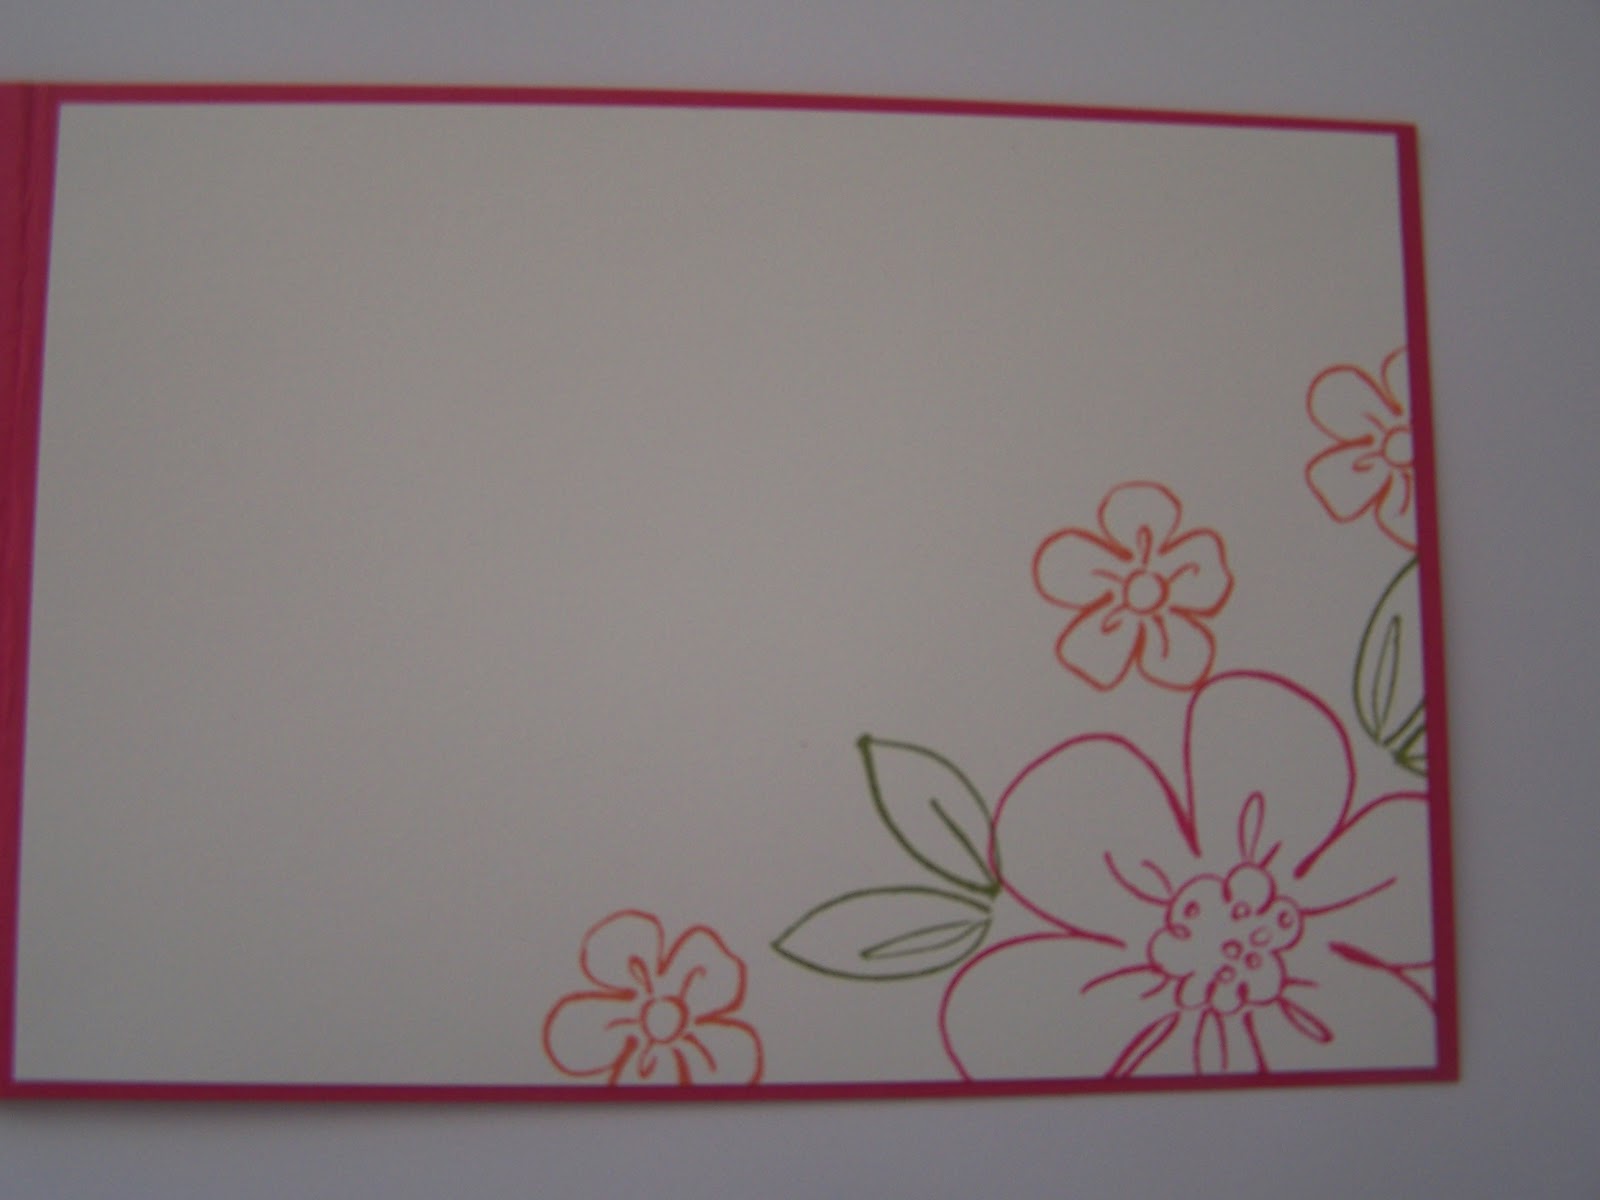
I love the bold bright colours of this card.  Not usually my colours but that is the great thing about Teaching & doing Techniques, it does get you right out of your comfort zone.  Plus I like to try & create cards that I know the ladies in the class will like, as well as creating cards to suit each individual style.


Until next time, Happy Stampin'


Saturday, 29 December 2012

Faux Patrina.....

... is one of the Techniques we completed in our Technique Class way back in October.  The 2nd card you can check out here

Usually when doing techniques, especially the ones that I think do not require a lot of embellishment on the cards, I like to keep them very simple.  This way the technique is shown to it's full potential & not overpowered by stamps, etc.

In fact, if I remember correctly I took the layout from a sketch we had going at Sunny Challenges & Creations.  I am really happy with the final look of the card, but more importantly so were the ladies who attended the class.


Until next time, Happy Stampin'


Sunday, 30 September 2012

SC 061/12...

Woke up this morning to the glorious sound of RAIN!!!!!!  Keep it coming Huey!

Our challenge this week over at Sunny Challenges & Creations is to "Use Something from the NEW Idea Book & Catalogue".   What a great challenge - it could be from as small as a Button, Embossing Powder through to Embossing Folder & Stamps.  The possibilites are endless!

For the life of me, my mine went a complete blank & couldn't get my head around all the stamps, so I opted to use something from the new Holiday Catalogue, although I have used one of the new In Colours AND Ink.

Measurements -
Base Card - Lucky Limeade - 8 1/4" x 4 1/8" 0r 22cm x 15cm - Scored in middle & folded in half
:Layer 1 - Very Vanilla - 3 7/8" x 5 3/8" or 10cm x 13.5cm
Layer 2 - Primrose Petals - 2" x 5 1/8" or 5cm x 13cm
Layer 3 - DSP - 1 7/8" x 5" or 4.5cm x 12.5cm
Layer 4 - Primose Petals - 2" x 4 1/2" or 4.5cm x 11.5cm

Supplies -
Stamp Set - Perfect Punches
Ink - Primrose Petals, Early Expresso
Cardstock - Primrose Petals, Very Vanilla, Lucky Limeade
DSP - Candlelight Christmas Speciality Series Paper
Punches - Scallop Circle, 1 1/4" Circle
Embossing Folder - Perfect Polka Dots
Accessories - Snail Adhesive, Simply Scoring Tool, Stampin' Dimensionals, Sticky Strip, Big Shot, Tombow Multipurpose Glue

I run the piece of Very Vanilla Cardstock through the Bigshot using the Perfect Polka Dots Embossing Folder & adhered to the Base Card - Lucky Limeade with Tombow Multipurpose Glue.
All layers of DSP were adhered to the corresponding pieces of Primrose Petal Cardstock prior to adhering to the Base Card with Snail Adhesive.

I cut a piece of 12" x 1 1/4" strip of DSP, scored at 1/4" intervals with my Simply Scoring Tool, folded concentina style & adhered to the Base Card with Sticky Strip.

For my sentiment, I stamped the image twice onto a scrap of Very Vanilla Cardstock - once in Early Expresso & the other in Primrose Petals.  The stamped image in Early Expresso Ink was punched using the Scallop Circle Punch while the Primrose Petal image was punched with the 1 1/4" Circle Punch.  I adhered the smaller circle to the top of the Early Expresso piece with Stampin' Dimensionals prior to adhering to the Rosette with Sticky Strip.


Don't forget to pop on over to check out what Gwen, KrisChristine, Jonia have created & join us this week for this great challenge.

Until next time, Happy Stampin'


Tuesday, 25 September 2012

Faux Wood...

Envelope & Inside...
I love how easy this card come together.  The technique is fantastic & very easy to complete.  Makes for a great male card - we all have trouble with creating them sometimes.

This will be one of the cards we are going to create in our next technique class - details below - "Faux Wood".....

I've used colours that are not normally used in the everyday wood you see around the place, as I wanted to try someting different & to see if I could create a completely different look.  To lift the colours a little, I decided to add a little bit of Real Red.  I'm glad I did, as it brough the whole card alive, including the background.

I want the card to be for a male, but instead of for the traditional stamps, eg cars, trees, etc, I thought "why not a Rosette?"  Who says these can't be for the males?  I'm really happy with the final result, but would love to hear what you think.

Venue    Caloundra Community Centre
               78 Buderim Street, Currimundi
Cost        $15.00
Time       1.00pm - 4.00pm
BYO       Tool Kit & Adhesives
Date        Sunday,  7 October


Close Up of Faux Wood & Rosette...
  
Don't forget to check back in a couple of days time & I will show you the 2nd card we will be crating using the same technique.
 
Until then, Happy Stampin'

Sunday, 23 September 2012

SC 06012...

Our challenge this week was set by Gwen.  Along with the sketch we have to use Embossing on our cards, ie Heat Embossing or Dry Embossing using your Big Shot & Embossing Folders or any other Embossing that you may like to try.

I've been playing with colours the last couple of weeks & decided to go ahead with one of the combinations I found I really liked. 

Measurements -
Base Card - Whisper White - 8 1/4" x 4 1/8" or 22cm x 15cm
Layer 1 - Basic Gray - 5 3/4" x 4" or 14.5cm x 9.5cm
Layer 2 - Whisper White - 5 5/8" x 3 7/8" or 14cm x 9cm
Layer 3 - Not Quiet Navy - 1" x 5 5/8"

Supplies -
Stamp Set - Perfect Punches, Nature Walk, French Foliage, Established Elegance
Ink - Baja Breeze, Marina Mist, Basic Gray, Not Quite Navy
Cardstock - Whisper White, Basic Gray, Not Quite Navy
Ribbon - 5/8" White Organza
Punches - Scallop Trim Border, Scallop Oval
Embossing Folder - Vimtage Wallpaper
Accessories - Stampin' Up! Dimensionals, Tombow Multipurpose Glue, Snail Adhesive, Big Shot

I randomly stamped my images onto the smaller piece of Whisper White Cardstock using Basic Gray, Baja Breeze, Marina Mist & Not Quite Navy Inks.  The whole piece was put through the Big Shot using Embossing Folder - Vintage Wallpaper.

I punched along both sides of the piece of Not Quite Navy Cardstock with the Scallop Trim Border Punch, adhered the ribbon along the middle, tucked the ends under & tied a knot.  This whole piece was then adhered to the piece of Basic Gray Cardstock & finally to the Base Card - Whisper White.

I stamped the wording onto a scrap piece of Whisper White Cardstock with Not Quite Navy Ink, punched with the Scallop Oval Punch & adhered to the card with Stampin' Dimensionals.


Don't forget to hop on over to Sunny Challenges & Creations to check out what the other girls have created.  This is the perfect time to dig out those Heat Tools or your Big Shot & join us this week for this fun challenge.

Until next time, Happy Stampin!

Tuesday, 31 July 2012

SC 051/12...

Our sketch this week over at Sunny Challenges & Creations was to create a male card & of course we had to use the sketch too.
 
I set this sketch & for some reason or other found it very hard to do, but managed to get there in the end, I think.

Measurements -
Base Card - Not Quite Navy - 8 1/4" x 5 7/8" or 21cm x 15cm - Scored in the middle & folded in half
Layer 1 - Crumb Cake - 3 7/8" x 5 5/8" or 10cm x 14.5cm
Layer 2 - Not Quite Navy - 5" x 1 1/2" or 13cm x 4cm
Layer 3 - Ridinig Hood Red - 4" x 3" or 10.5cm x 7.5cm
Layer 4 - Crumb Cake - 3 7/8" x 2 7/8" or 10cm x 7cm

Supplies -
Stamp Set - Circle Circus, Perfect Punches
Ink - Basic Black, Crumb Cake
Cardstock - Crumb Cake, Not Quite Navy, Riding Hood Red
Punches - Large Oval, Decorative Label
Accessories - Simply Scoring Tool, Snail Adhesive, Regal Designer Buttons, Linen Thread, Crystal Effects

I stamped my large piece of Crumb Cake Cardstock using images from Circle Circus & Crumb Cake Ink.
Using my Simply Scoring Tool, I scored a couple of lines along the piece of Not Quite Navy prior to adhering it to the Crumb Cake Cardstock with Snail Adhesive.

I stamped the smaller piece of Crumb Cake Cardstock with random images in Basic Black Ink, tied some Linen Thread through 3 different sizes of  Regal Buttons & adhered to the centre of the images with Crystal Effects.  This piece was then adhered to the Riding Hood Cardstock & then to the Base Card with Snail Adhesive.

The sentiment was stamped onto a scrap piece of Crumb Cake Cardstock in Basic Black Ink, punched with the Large Oval Punch & adhered to a piece of Riding Hood Red which had been punched with the Decorative Label Punch & adhered to the Base Card with Snail Adhesive.


Why not pop over to check out what Gwen & Kris have created, create your project, post to your blog or on-line forum & then link to Mr Linky.  We would love for you to join us.

Happy Stampin'


Thursday, 21 June 2012

Technique Class....

One of our techniques last sunday arvo was the "Reverse Spotlighting".  what a fun, fun technique & we all enjoyed creating this card.  Not only was the technique used on the card, but we created an "Easel Card" as well.

Bottom of Easel...

Aren't the colours gorgeous on this card.  This is the first time, this stamp set has been inked, but think it will be seeing a lot more ink somehow, as it stamps such beautiful images.

Have a great day!


Thursday, 29 December 2011

Xmas Scrapbook Page...

I wasn't going to scrap the photos I took on Christmas Day this year, but looking at them, I suddenly realised I had a photo of 4 generations......  It doesn't happen very often, although Jill has 6 great grand kids......  the oldest being 16! She is often babysitting 3 of them, 2 of whom are twins, so they keep her on her toes. 

Mind you, she will not & has never given up her social life to babysit.  She has always said to her grandkids, she would only look after them if she has nothing on.  Well, in Jill's social calendar that is not very often.  I can't wait to retire!!!!!!!!!!!

The photo was layered onto a piece of Riding Hood Cardstock, leaving 1/8" border prior to adhering to the Whisper White Textured Cardstock.  For some reason I always like to use Textured Cardstock as my main page .

I incorporated the flower that I wore in my hair on Christmas Day - made from a couple of flowers I had lying around, added Rhinestones to the middle & bamo, you have an ornament for your hair!  I then hot-glued a clip on the back.  The clip was removed as I adhered a couple of Stampin' Dimensionals to the back.  I also sponged a bit of Riding Hood Red Ink to the flower to make it pop a little.
I stamped the tree with Garden Green Ink onto Whisper White Cardstock before adhering to a layer of Basic Black Cardstock & then to the page. 

For the Scallop Circles, I used one of the images from Circle Circus - have been wanting to use this set for something Christmas for so long - with Garden Green Ink, while the wording is in Tempting Turquoise Ink....  They were both punched using the Scallop Circle Punch.

The journalling was typed & printed onto Whisper White Cardstock, before laying onto a piece of Basic Black Cardstock & then to the page.

I used a couple of pieces of  Basic Black Ribbon to look like the journalling & embellishments were hanging from the top.

I basically wanted to keep the page simple & clean - my style of scrapbooking, while just picking up the suttle colours in the photo - Riding Hood Red, Tempting Turquoise, Garden Green, Black & White.

Supplies -
Stamp Set - Circle Circus, Perfect Punches, Lovely as a Tree
Ink - Tempting Turquoise, Riding Hood Red, Garden Green
Cardstock - Whisper White Textured, Basic Black, Riding Hood Red
Ribbon - 3/8" Taffeta - Basic Black
Punches - Scallop Circle
Accesories - Rhinestones, Stampin' Dimensionals, Snail Adhesive, Sponge


 Until next time, when I will show you the 2nd page!


Tuesday, 27 December 2011

Gift Card....


This is the last of my Christmas Postings - Yah!!!!!!!!!!!

I took the idea from Sandi who has a great tutorial on how to create it.....  I matched mine to suit the Box Bag I created a couple of days ago. 

Inside - Card for Greeting & Gift Card behind...


Gift Card...
Supplies -
Stamp Set - Perfect Punch, Baroque Motifs
Ink - Old Olive, Chocolate Chip
Cardstock - Whisper White, Old Olive
DSP - Letters to Santa
Punches - Scallop Border, Scallop Circle
Accessories - Mini Glue Dots, White Gel Pen, Sticky Strip, Snail Adhesive


Until next time, Enjoy!

Sunday, 11 December 2011

SC 020...

This week Kris set the challenge over at Sunny Challenges & Creations & it is all about "Christmas".

With everyone's busy schedule this time of year, you have 2 weeks to complete this challenge. 

The challenge is to share something Chrissy - 3-D, Gifts, Cards, Scrapbooking or in fact, anything you like with a Christmas Theme.

So come on everyone, grab that stampin' stuff & start stampin', creating or even baking!!!!!

My sample has been around in blog land for a long time now, but I wanted to create something for blokes that I didn't have to spend much time on & easy to fill once I had created it.  Not to mention, easy for them to get into too.

This bag is full of Chocolates ready for Christmas Day - Fingers crossed they will last that long with me around as I am my own worse enemy with chocolate around.

Once I created my box for the bottom, I cut my DSP & wrapped it around the bottom of the box.

I cut a strip of Old Olive Cardstock, punched one long side using the Scallop Edge Punch, added a bit of Faux Stitching with my Gel Pen & again wrapped it around the bottom of the box.

I punched 2 pieces of Old Olive Cardstock using the Round Tab Punch, applied Faux Stitching around the edges, punched a hole in each tab using my Crop-a-Dile & adhered one each side to the top of the bag. 

After I filled it with Chocolates, I tied 3 pieces of ribbon though the top.

The greeting was stamped direct onto Whisper White Cardstock using Old Olive Ink & adhered to the centre of the bag.

A really easy & quick project.


Supplies -
Stamp Set - Perfect Punches
Ink - Old Olive
Cardstock - Old Olive, Whisper White
DSP - Letters to Santa
Punches - Sallop Ede, Round Tab
Ribbons - 1/8" Taffeta - Old Olive, 1/4" Grosgrain - Whisper White, Chocolate Chip
Accessories - Sticky Strip, Multipurpose Glue, White Gel Pen, Croop-a-Dile

Don't forget to pop over to Sunny Challenges & Creations & check out what Kris & Gwen have created & have a go at creating something with a Christmas Theme yourself

Until next time, Enjoy! 


Wednesday, 20 July 2011

SFF071511...

I found this sketch over at Sketch Frenzy Friday & immediatly thought of Fifth Avenue Floral & Great Friend.  This is one of my favourites, but then I think most of my sets are, including ones I don't have - lol.

Base Card - Rich Razzleberry - 4 7/8" x 4 1/4" or 15cm x 10.5cm
Layer 1 - Old OLive - 4 3/4" x 4" or 14.5cm x 10cm
Layer 2 - Whisper White - 4 5/8" x 9.5cm
Layer 3 - Old Olive - 4 5/8" x 1" or 9.5cm x 2.5cm

Using Inks of Rich Razzleberry & Old Olive, I randomly stamped 2 different images onto a piece of Whisper White Cardstock.  I then adhered the small piece of  Old Olive Cardstock down the LHS of the Whisper White, layered a piece of Pumpkin Pie Satin Ribbon down the middle, followerd by a piece of Rich Razzleberry Grosgrain Ribbon on top of that & tied a bow towards the top.

Inside Card

I stamped the sentiment using Rich Razzleberry & adhered to Old Olive Cardstock which had been punched using my Modern Label Extra Large Punch.  I adhered to the top RHS of the card using SU Dimensionals.

I punched a piece of Whisper White Cardstock using my 1 3/4" Extra Large Circle Punch & with Old Olive Ink, stamped some leaf images.  I also stamped off while doing these too.  This was adhered to a piece of Pumpkin Pie Cardstock which had been punched using my Extra Large Scallop Circle Punch. For the white dots, I did these with my Gel Pen.

I stamped 2 butterfly images onto Whisper White Cardstock using Rich Razzleberry Ink, cut them out , applied a couple of Basic Rhinestones down the middle, curled them a little & adhered to the circle using SU Dimensionals.  I also added a couple of Rhinestones to the words in my sentiment.

These are colours I don't usually go for, but I am trying to think outside the box a little.  Mind you, I don't know how long it will last, but am quiet enjoying the different colours for the moment.

Supplies -
Stamp Set - 5th Avenue Floral, Great Friend
Ink - Old Olive, Rich Razzleberry
Cardstock - Whisper White, Rich Razzleberry, Old Olive, Pumpkin Pie
Ribbon - 5/8" Satin - Pumpkin Pie, 1/4" Grosgrain - Rich Razzleberry
Punches - 1 3/4 " Extra Large Circle, Extra Large Scallop Circle, Modern Label Extra Large
Accessories - SU Dimensionals, Tombow Multipurpose Glue, Basic Rhinestones, Gel Pen

Until next time, Enjoy!

Monday, 10 January 2011

Red Robin...

A beautiful photo of a lovely little bird!

I've created this card for the challenge over at Our Creative Corner

Like most of my cards, I've tried to keep it for any occasion, ie Birthday, Sympathy, Thank You, etc  I find this works easiest for me, then I am not having to try & think of a card to make at the last moment.  I will also make a lot of cards with no sentiment/greeting so that when I do need a card in a hurry, I then stamp a sentiment/greeting, either directly onto the card or adhere one to the card.

For my card -
Cut base card using Chocolate Chip Cardstock
Cut smaller piece of Cardstock using Riding Hood Red & adhere to base card
Cut Cardstock using Chocolate Chip - 4" x 2 1/2"
Cut piece of Garden Green Cardstock - 3 7/8" x 2 3/8
Adhere Garden Green to Chocolate Chip
Cut piece of Watercolour Paper - 3 3/4" x 2 1/4"
Stamp image using Chocolate Chip Ink
Using Aqua Painter, Chocolate Chip, Riding Hood Red & Garden Green Inks, colour image
Adhere Watercolour Paper to Garden Green piece of Cardstock
Attach Brad to middle piece of ribbon
Attach ribbon across bottom of image & tuck ends under
Attach whole section to the base card
Stamp sentiment/greeting using Chocolate Chip Cardstock & punch using Oval Punch
Punch piece of Riding Hood Red Cardstock using larger Oval Punch
Punch piece of Garden Green Cardstock using Scallop Oval Punch
Adhere all 3 pieces together
Adhere to RH bottom of card

Supplies -
Stamp Set - Every Moment, Great Friend
Inks - Chocolate Chip, Garden Green, Riding Hood Red
Cardstock - Watercolour Paper, Chocolate Chip, Riding Hood Red, Garden Green
Ribbon - Retired
Punches - Scallop Oval, Oval, Oval Large
Accessories - Snail Glue, Aqua Painter
Non-SU - Brad

This card could be used for male or female or for that matter any occasion!

Until next time, Enjoy!

Wednesday, 29 December 2010

Cheers to You...

G'Day Stampers,

I hope you all had a great Christmas, despite the floods in Qld & the snow in parts of USA & Europe.  To think that Perth has Bush Fires!

Today's card is from the sketch over at Stamping 411 and as usual a great one to use in creating a card or project.

For my card, I used supplies from the current Summer Mini Catalogue.  I cut my Cardstock - So Saffron and adhered Regal Rose to the top of it.  I then cut a piece of DSP - Island Oasis - to adhere to the top of Regal Rose.

Using my Scallop Trim Punch, I punched both top & bottom of the Tempting Turquoise Cardstock and adhered a piece of So Saffron across the middle of it.

I then stamped the sentiment from "Cheers to You" in Chocolate Chip directly onto the So Saffron.  Inking the branch in Old Olive from the Stamp Set "Tropical Party", I stamped a couple of random images directly onto the So Saffron.

I inked the coconut from the same Stamp Set, coloured the umbrella & straw using my Watercolour Pencils, cut around the image & adhered over the top of the branches using SU® Stampin' Dimensionals.


Supplies -
Stamp Set - Cheers to You, Tropical Party*
Inks - Chocolate Chip, Old Olive
Cardstock - Whisper White, Tempting Turquoise, So Saffron, Rose Red
DSP - Island Oasis*
Punches - Scallop Trim
Accessories - Snail Adhesive, Watercolour Pencils, Stampin' Dimensionals

*Summer Mini-Catalogue - 2011

Until next time, Enjoy!

Sunday, 12 December 2010

Joy at christmas...

It's Sketch Frenzy Friday again!

The card created especially for this challenge is very easy using the DSP from SU® -  Jolly Holliday.  The colours in this paper are so stunning, not your normal bright greens & reds.

To create my card, I layered DSP onto Old Olive Cardstock.  I cut a piece of Cherry Cobbler Cardstock & using my Scallop Edge Punch, punched along one side.  Cutting a piece of DSP, I adhered to the Cherry Cobbler Cardstock.  This piece was then adhered across the middle of the card.

Using Joy at Christmas image from Perfect Punches, I stamped it in Old Olive & punched out using the Scallop Circle.  I adhered this over the top of the DSP placed in the middle.

I finished off with Jewles - Basic Pearls.

Supplies -
Stamp Set - Perfect Punches
Ink - Old Olive
Cardstock - Old Olive, Cherry Cobbler, Very Vanilla
DSP - Jolly Holiday
Punches - Scallop Circle, Scallop Edge
Accessories - Multipurpose Liquid Glue, Jewels - Basic Pearls

Tip - Did you know Perfect Punches Stamp Set fits Scallop Circle, Wide Oval, Scallop Oval, Modern Label, Round Tab and Curly Label Punches?

Until next time, Enjoy!

Tuesday, 7 December 2010

Happy Birthday...

I've created this card for the challenge over at Creative Sketches  I've never attempted a challenge over there, but this one looked quiet good & immediately thought Male, along with the DSP- Woodland Walk from SU®  The jury is still out on this one, but think maybe it is starting to grow on me.

I've used both Very Vanilla & Chocolate Chip Grosgrain Ribbons on this card.  I wanted to highlight the Very Vanilla in the DSP, while at the same time break up the joining of the DSP using Chocolate Chip.

I punched 3 stars using the small Star Punch & adhered to the DSP.  Using my 1/16" Handheld Circle Punch, I punched 3 dots using Chocolate Chip Cardstock  - a little fiddley, but it is what I had in my mind, so I had to fiddle for a little.  I then adhered these to the middle of the stars & applied Crystal Effects over the top to give a little more dimension.

For the sentiment, I used the stamp from Perfect Punches, stamped it in Chocolate Chip & punched out using Extra-Large Oval Punch.  I then adhered this directly to the DSP.

All in all, a very simple & clean male card!

Supplies -
Stamp Set - Perfect Punches
Ink - Chocolate Chip
Cardstock - Garden Green, Very Vanilla, Chocolate Chip
DSP - Woodland Walk
Punches - Extra-Large Oval, Small Star, 1/16" Handheld Punch
Accessories - Multipurpose Liquid Glue, Grosgrain Ribbon - Very Vanilla & Chocolate Chip, Crystal Effects

In the meantime, why not have a go at the sketch yourself - I would love to see the results or better still post them directy to Creative Sketches.

Until next time, Enjoy!


LinkWithin

Related Posts Plugin for WordPress, Blogger...