Showing posts with label Petite Pairs. Show all posts

Friday, 1 November 2013

Pre-Cut Kits...

"Festive Flurry"
is our stamp set for the month of November.

Along with this gorgeous stamp set, I've gone with the gorgeous DSP - Winter Frost Speciality Papers from the Seasonal Catalogue.  All 4 cards have a different Embossing Folder which gives them all their own look while at the same time using the same supplies.

 To purchase your kit, all you have to do is click on Stamp of the Month Kits at the top of the page.  It will take you straight to the page where you will see the PayPal Drop Down Button.
 
Once payment has been received, your kits (Australia only) will be posted in the mail.  You will receive your PDF Tutorial (available to anyone) via email.
 
 
  •  To order Stampin' Up! products online, please Shop Here
  • Want to join my family, and be a part of a group that loves to stamp together, Join Here
  • To check out available classes or to attend any of the classes, please Click Here, click on the "Classes/Workshop" Page or email me vickiawright@bigpond.com
Until next time, Happy Stampin'
 
Vicky

Wednesday, 16 October 2013

SC 090/13...

Our current challenge over at Sunny Challenges & Creations is to create something using the fantastic "Framelits" from Stampin' Up!

I decided to create a Christmas Card for this challenge.  I am in the process of creating these cards for my next market coming up first Sunday in November, so this was the perfect opportunity for me.

Truth be told, I didn't really know where I was going with this card, but knew that I wanted to use the "Ornament Keepsakes" with the dotty DSP from "Season of Style" which is in the current "Holiday Catalogue".  Of course I had to used my favourite EF - Perfect Polka Dots!

Supplies –
Stamp Set              Ornament Keepsakes – 128051, Petite Pairs - 122497
Ink                             Old Olive – 126953, Chocolate Chip – 126979,
Cherry Cobbler – 126966
Cardstock              Whisper White – 106549, Old Olive – 106576, Chocolate Chip – 108599, Cherry Cobbler - 121681
DSP                           Season of Style - 132340
Embossing Folder Perfect Polka Dots - 117335
Framelits               Holiday Ornaments – 127816, Adorning Accents - 125595
Punches                 Large Oval – 119855, Scallop Oval – 119856, 1” Circle - 119868
Baker’s Twine      Cherry Cobbler - 123125
Accessories          Snail Adhesive – 104332, Stampin’ Dimensionals – 104430, Pearls – 119247, Glue Dots - 103683


Don't forget to head over to Sunny Challenges & Creations to check out what the other members of the Design Team have created.  We would really love for you to join us this in this challenge.  You have 2 weeks to create your project & link back with Mr Linky.

Click on the link below to get your Tutorial to create your own card
 

  •  To order Stampin' Up! products online, please Shop Here
  • Want to join my family, and be a part of a group that loves to stamp together, Join Here
  • To check out available classes or to attend any of the classes, please Click Here, click on the "Classes/Workshop" Page or email me vickiawright@bigpond.com

  • Until next time, Happy Stampin'
     
    Vicky

    Wednesday, 2 October 2013

    Pre-Cut Kits....

    Our stamp set this month is the great Christmas set which has been carried over -
    "Ornament Keepsakes"

    With Christmas just around the corner, this is the prefect chance to make an early start on those cards in time for posting in December.
     
    This month, we have showcased the gorgeous new DSP - Season of Style - which is in the Seasonal Catalogue.  The kit is very tradition Christmas colours.  The new Embossing Folder - Stylish Stripes is also showcased in this set of cards.  In fact one of the cards has a small surprise inside, but shhhhhhhhhhhh if I tell you what it is then it won't be a surprise!

     To purchase your kit, all you have to do is click on Stamp of the Month Kits at the top of the page.  It will take you straight to the page where you will see the PayPal Drop Down Button.
     
    Once payment has been received, your kits will be posted in the mail.  You will receive your PDF Tutorial via email.
     
     
    •  To order Stampin' Up! products online, please Shop Here
    • Want to join my family, and be a part of a group that loves to stamp together, Join Here
    • To check out available classes or to attend any of the classes, please Click Here, click on the "Classes/Workshop" Page or email me vickiawright@bigpond.com
    Until next time, Happy Stampin'
     
    Vicky

    Friday, 19 July 2013

    Sending Sympathy....

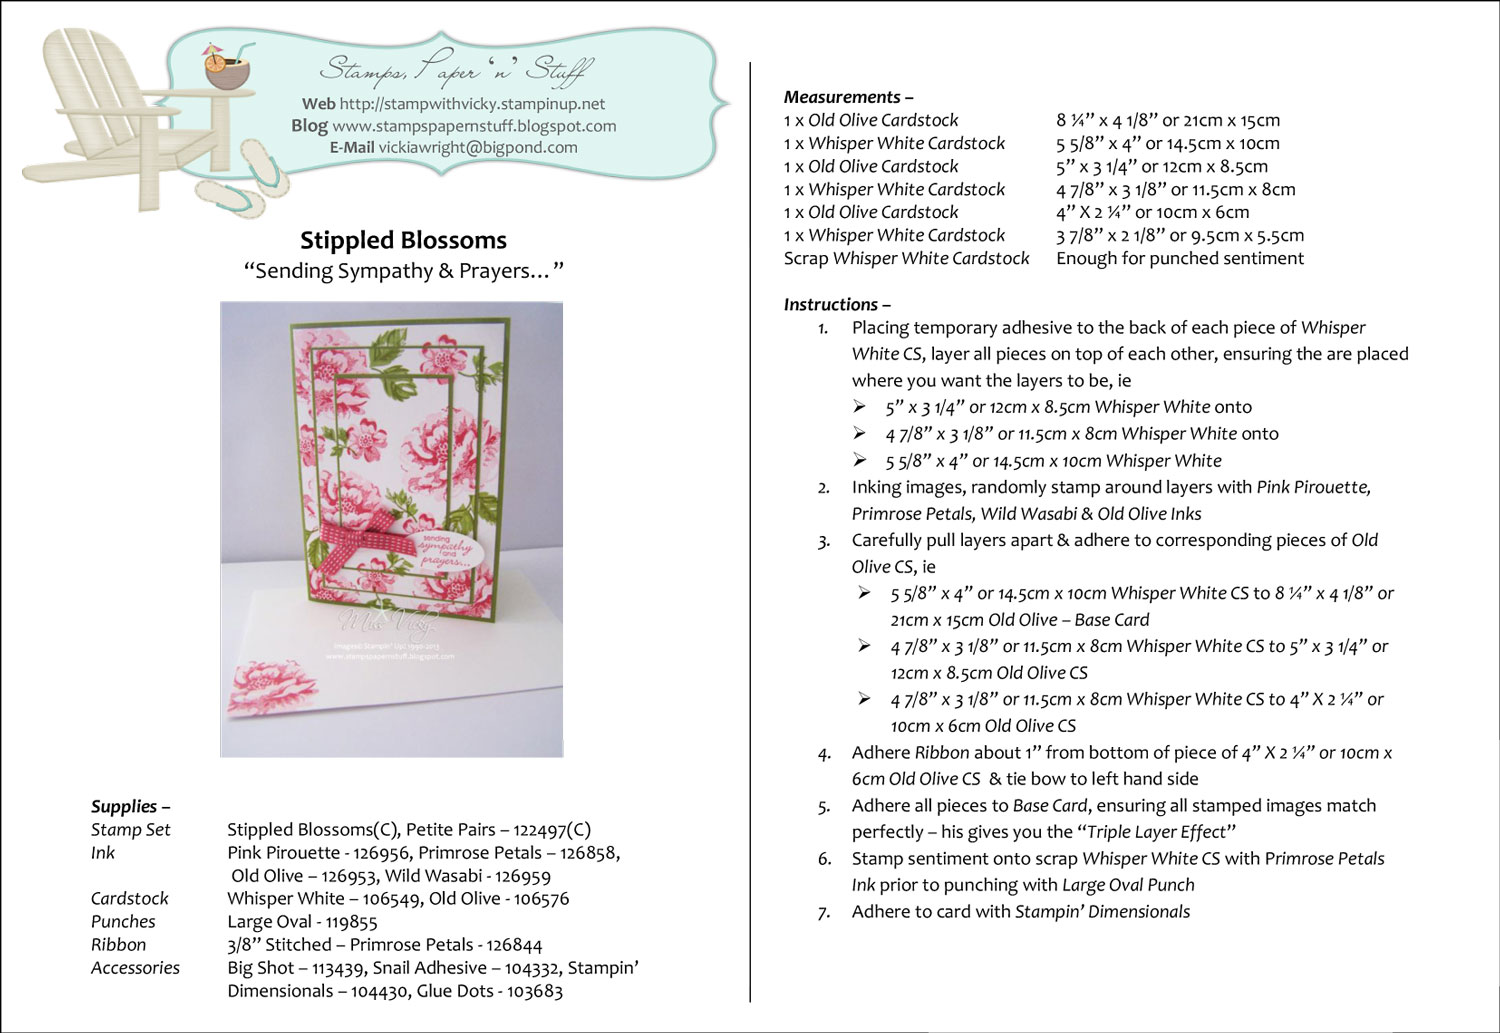
    Our card today is a Triple Layer Card we created in Crafty Creations at the Caloundra Community Centre this afternoon.   The ladies loved it, although we did have a few accidents - ink accidents, ie....

    Not only could your imagination go wild thinking of different placements for the front, but they are an easy card to create as well as having a every effective card at the end.

    I don't usually create bright cards, but tend to use the Neutral & Subtle Colour Families.  When doing classes I like to think "outside the square", so to speak which means I tend to take into account what each person likes including colours & styles. It would be a very boring world if we liked all the same, wouldn't it?

    Supplies used to create this card -
    Stamp Set  -  Stippled Blossoms (C) - 126747, Petite Pairs(C) - 122497
    Ink  -  Pink Pirouette - 126956, Primrose Petals - 126858, Old Olive - 126953, Wild Wasabi - 126959
    Cardstock  -  Whisper White - 106549, Old Olive - 106576
    Punches  -  Large Oval - 119855
    Ribbon  -  3/8" Stitched - Primrose Petals - 126844
    Accessories  -  Big Shot - 113439, Snail Adhesive - 104332, Stampin' Dimensionals - 104430, Glue Dots - 103683
     
     
    Don't forget to click on the link below so that you can print & save the instructions to create your own Triple Layer Card


    •   To order Stampin' Up! products online, please Shop Here
    • Want to join my family, and be a part of a group that loves to stamp together, Join Here
    • To check out available classes or to attend any of the classes, please Click Here, click on the "Classes/Workshop" Page or email me vickiawright@bigpond.com
    Until next time, Happy Stampin'
     
    Vicky

    Thursday, 18 July 2013

    Birthday Wishes....

    I've been a huge fan of Silke Leglow way before I started Stampin' Up!  I love her clean crisp cards.

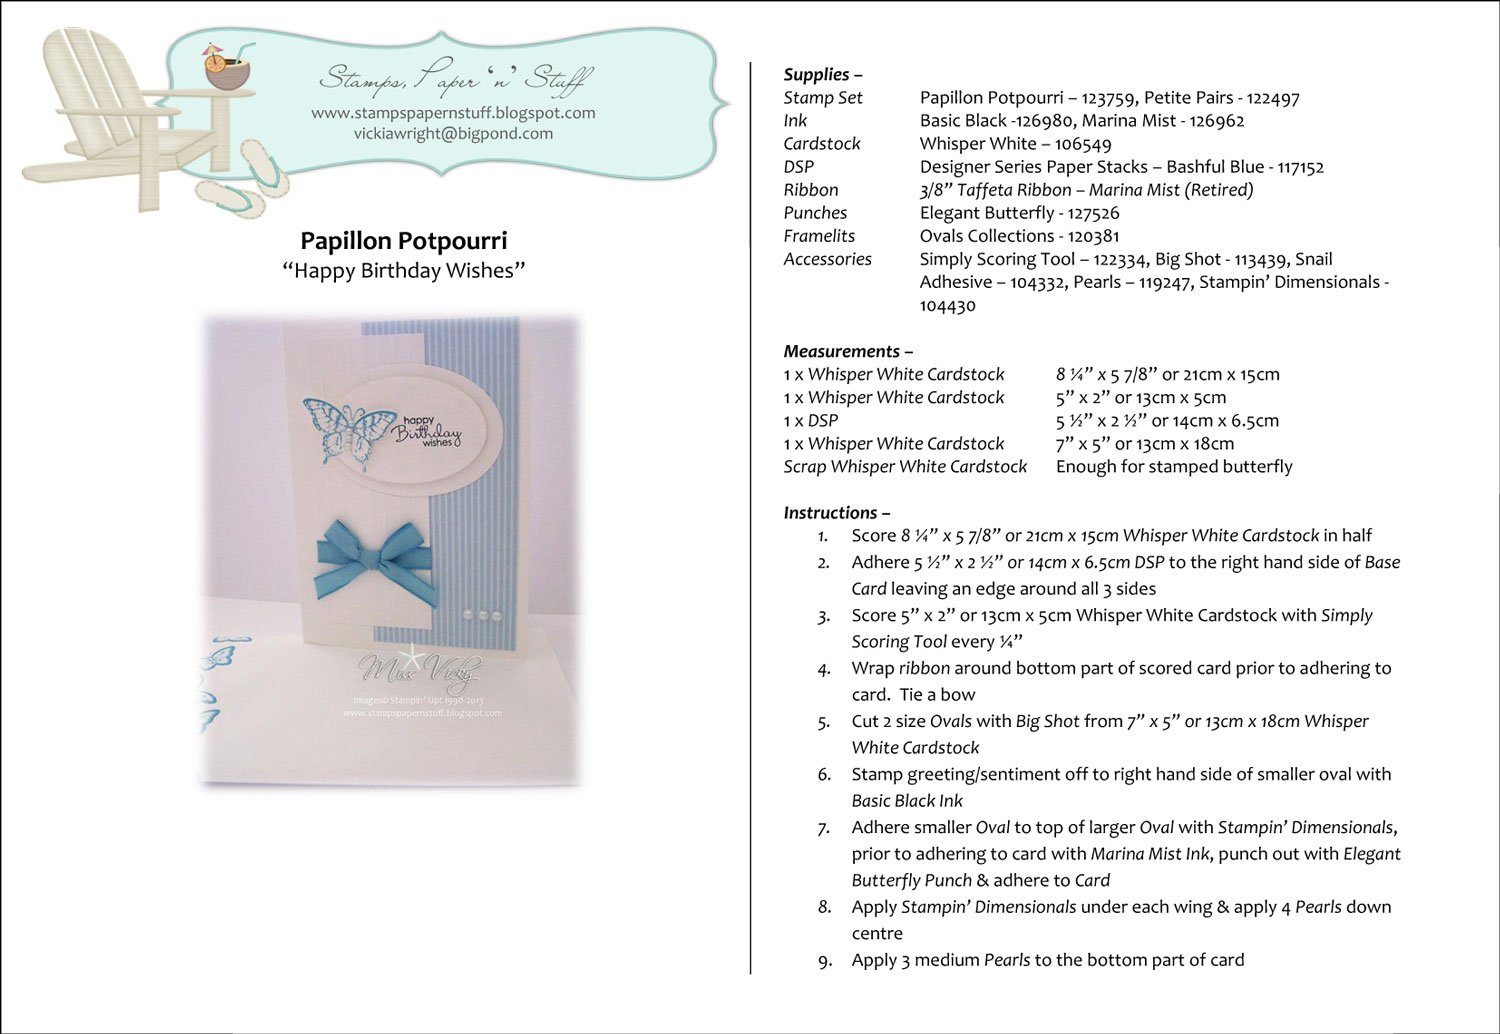
    Today's post is one of the cards we did in a class way back in May but of course I changed it to suit Stampin' Up! products.  Thank you so much Silke for your inspiration!

    Inside Card -
     
    Card Front -
     
    Tutorial for you create your own card


    •  To order Stampin' Up! products online, please Shop Here
    • Want to join my family, and be a part of a group that loves to stamp together, Join Here
    • To check out available classes or to attend any of the classes, please Click Here, click on the "Classes/Workshop" Page or email me vickiawright@bigpond.com
    Until next time, Enjoy
     
    Vicky
     

    Wednesday, 10 July 2013

    SC 083/13...

    It was my turn to create the challenge this week over at Sunny Challenges & Creations & thought seeing as though it is now July - a Christmas Challenge would be in order.  Along with the sketch, we had to create a card, 3-D item or scrapbook page.

    I don't know if you have noticed in the new catalogue that there are NO Christmas/Holiday Stamp Sets or Accessories, BUT there is the Carry Over List from the Autumn/Winter Catalogue.  In saying that, there is no reason as to why you could not use a retired Stamp Set to create your card or even a non-traditional stamp set!!!! You may surprise yourself with what you can come up with!

    For those that know me, I tend to steer away from traditional Christmas Colours & like to go more with non-traditional colours, as in today's card - Very Vanilla, Soft Suede & Pink Pirouette.  I love these colours together & not just for Christmas.  Of course, how could I not create a card without using my favourite Embossing Folder - Perfect Polka Dots!

    Supplies -
    Stamp Set Ornament Keepsakes - 128051, Petite Pairs - 122497
    Ink  Pink Pirouette - 126956
    Cardstock  Very Vanilla - 106550, Soft Suede - 119982
    Framelits  Holiday Ornaments - 127816
    Punches  Large Oval - 119855, Scallop Oval - 119856
    Embossing Folder - Perfect Polka Dots - 117335
    Accessories  Big Shot - 113439, Snail Adhesives - 104332, Multipurpose Liquid Glue - 110755, Stampin' Dimensionals - 104430, Rhinestone Basic Jewels - 119246, Stampin' Write Marker - Neutrals - Soft Suede - 131261

     
    Don't forget to pop on over to Sunny Challenges & Creations to check out what lovely cards the Design Team - Kris & Libby - have created.

    We would really love for you to join us as we love seeing what everyone creates, but more importantly love leaving you all comments.
     
    Tutorial for you to create your own card -
     
     
    Until next time, Happy Stampin'

    Sunday, 30 June 2013

    Last Day...

    ... to order from the Retiring List

    To celebrate the current Stampin' Up! Catalogue, I thought I would share with you the box of cards I created again using Retiring Products.  The idea come about after creating my card for the current Sunny Challenges challenge, which still has one more week to run, so it is not too late to link your creation with Mr Linky.

    If you remember I created a box of 3 x 3 Gift Cards using Nature Walk & the Regal Inks which are retiring, a couple of days ago, so this time I thought I do would a similar sort of thing using the retiring Subtles Colours.

    I created 4 cards - 2 x Regal Rose & 2 x Pretty in Pink.  All cards have a different greeting/sentiment on them. The box has touches of Pretty in Pink.  The word "Cards" on the box was created in MDS & printed in Certainly Celery.

    Regal Rose & Pretty in Pink

     
    Until next time, Happy Stampin!
     
    Vicky

    Sunday, 23 June 2013

    SC 082/13...

    Our challenge over at Sunny Challenges is to create a project using the sketch as well as retiring Stampin' Up! product.  To play along, all you have to do is check out that long Retiring List.

    As the sketch is wide open, I thought I would try something a little different with my card this week.  In fact I enjoyed this fun technique that it is going to be included in our Technique Class next month.

    I remember seeing a card which was using a tile technique on Pinterest, but as usual didn't take much notice or didn't save it, thinking I would not be using it, but it did stick in my mind.  Thank you so much for your inspiration.

    After playing around for a little time, I eventually come up with something that I was happy with.

    Not only did I do this for the challenge, but I also created a couple to post off to a couple of customers this month - different colours of course, but will show you them at a later stage.

    Retiring Products I've used included -
    Stamp Set - Nature Walk
    Cardstock - Baja Breeze
    Ink - Baja Breeze
    SU! Write Markers - Baja Breeze, Certainly Celery

    I am really going to miss the Stamp Set - Nature Walk, but no doubt SU! will have something better.

    Baja Breeze -
     
    Bashful Blue -
     
    Don't forget to pop on over to Sunny Challenges & check out what both Kris & Carole have created using the sketch & retiring products.
     
    You have 2 weeks to create your project.  We love seeing your work & leaving comments, so be sure to link it back with Mr Linky.
     
    Until next time, Happy Stampin'
     
    Vicky

    Tuesday, 18 June 2013

    Pleated Skirts....

    I am so far behind in my posts that I think I have enough cards to post for the next couple of months without adding any extras I've created in between posts.  Where does the time go????

    Our card today is one we created sometime ago in Crafty Creations.  As most of the ladies have either a Big Shot or Cuttlebug, once a month, we concentrate on these products.  It is usually a great way for them to learn how to use their tools.  Included in this class we also concentrated on the Technique - Chalks or Pastels, including learning how to create a pleated skirt from paper.

    I let the ladies know what we will be creating each week & what to bring along if they want.  This way, they are using the "stuff" they may have & familiarising themselves with their own "stuff".  I took along a number of different Embossing Folders for the ladies who don't have a machine or Folders.

    I think this is another card I saw on Pinterest, but am not that sure.  Please let me know if you recognise it, as I would love to give you credit for the inspiration.

     
    Instructions to create your own card -
     
     
    •   To order Stampin' Up! products online, please Shop Here
    • Want to join my family, and be a part of a group that loves to stamp together, Join Here
    • To check out available classes or to attend any of the classes, please Click Here, click on the "Classes/Workshop" Page or email me vickiawright@bigpond.com
    Until next time, Enjoy
     
    Vicky 

    Friday, 24 May 2013

    Sending Sympathy....

    I needed a Sympathy Card to post out this week, so I dug up one of the rare cards that I saved.  I've cased (copied & shared everything) from Sarah Willis  I'm not even sure where I come across it or when I come across it.  It is quiet an old card as it uses a stamp set from last year's SAB.

    Thanks so much Sarah for the inspiration!

    The Framed Tulips EF is not one that I have used a lot, so thought it gave me the perfect opportunity to dig it out of the box & dust it down.  I quite like the result of the EF but believe me it was hard not to use my favourite Perfect Polka Dots.  In saying that, if you look closely, I managed to get it on here anyhow.

     
    Supplies –
    Stamp Set              Petite Pairs – 122497, Fresh Vintage – SAB 2012
    Ink                           Soft Suede - 126978
    Cardstock              Very Vanilla – 106550, Soft Suede - 119982
    Embossing Folder Framed Tulips – 121809, Perfect Polka Dots - 117335
    Punches                 1 3/8” Circle – 119860
    Framelits                Labels Collections - 125598
    Markers                  Subtles – 119700
    Accessories           Big Shot - 113439, Snail Adhesive – 104332, Stampin’ Dimensionals – 104430, Pearls - 119247
    Shop Online Here to purchase your own supplies to create your card
     
    Click on the link below to print the instructions to save


    Until next time, Happy Stampin'
     
    Vicky

    Sunday, 28 April 2013

    SC 078/13...

    Our challenge over at Sunny Challenges & Creations has been set by Gwen.  She has been very kind to us this week as there is no sketch, but we are requested to create a Card, 3-D Project or even a Scrapbook Page with a "Sympathy Theme".

    I actually completed my card for a couple of challenges ago, but when I went to post it, realised that I had the wrong challenge.  I have since used the card, so it is no longer in my possession.

    I love the little rose which is in Stamp Set "Papaya Collage".  It seems to suit any occasion & I have used it a lot of late.  In fact this is one of the cards we created in our Stamping Classes this month.

    I love the clean simple look of the card. 


    To grab the tutorial for your own use, please click on the link below -


    Shop Online to purchase your supplies to create your own card
     
    Don't forget to head on over to check out what Gwen, Kris & Maria have created for this challenge.
     
    Until next time, Happy Stampin! 


    Wednesday, 17 April 2013

    SC 077/13...


    I am a little late with posting my card for the current challenge over at Sunny Challenges & Creations, but I suppose it is better late than never.

    Our challenge this week has been set by myself & with Mother's Day coming up, I decided that it would be the perfect opportunity to create a card with Mother's Day in mind.  You also have the option of creating a card for a female, if you prefer.

    My card was created using Whisper White & Regal Rose - perfect colour for mums & females.  I usually go for something non-traditional in colour but decided to go with all white with just a small touch of a contrasting colour.

    Yep, I've even used my favourite Embossing Folder - Perfect Polka Dots for part of my card, while the bottom section, I decided to randomly score a few lines with my Simply Scoring Tool. 

    While creating the card, I sort of decided to punch a section from the embossed card & then have the sentiment & a couple of images sneaking out from behind.  I really like the final result.

    Inside Card -


    Card Front -
     
    Please click on the link below to copy & print your copy of how I created my card


    Shop Online here to purchase your supplies
     
    Don't forget we would love to see what you can create using the sketch above.  Head on over to Challenges & Creations to check out what the rest of the team have created.
     
    Until next time, Happy Stampin' 
     

    Thursday, 4 April 2013

    Rosette...

    As most of you are probaly aware, I do a volunteer class at Caloundra Community Centre each Friday arvo.  It is a fun class with a lovely lot of ladies.  We are steadily growing with the averge class being about 10.

    We are now in our new centre & I must say it is so lovely having all the mod cons & new area to work in.  Sitting on top of a hill & not far from the beach, there is always a lovely breeze. 
    Inside Card...
    My card today is one we created a couple of weeks ago in Crafty Creations - Volunteer Class.  I love Rosettes and the ladies often ask if they can do more of them.  As it turns out, there is usually 1 or 2 of them that either missed the previously classes on Rosettes or have only just started with us.  It also gives the ladies who have Glue Guns a chance to bring them along & play.

    Ther is only one stamp used to create this card & that is the greeting.  In saying that, it could easily be altered to include stamps, including the centre of the Rosette.

    I wanted to show the class that you don't have to have a lot of stamps to create a lovely card.  I love the way I've used the Pearls & created an "apron", so to speak.  The spiral of Pearls was a last minute idea, but actually help finish the card a little more.

     
    Please click on the link below so you are able to print your own Tutorial


    Until next time, Happy Stampin' 


    Saturday, 23 February 2013

    For the New Mr & Mrs......

    I seem to be in a bit of  "Blue" ood of late, as today's card is yet another blue one.
     
    I like to create cards for the Bride & Groom whose stationery I create for their Receptions.  Along with a copy of all the stationery for themselves to keep for their memnto or album, I include a  simple "Congratultions" card usually with the colours of their wedding.  I think this is a lovely touch to finish off the job as well as something that they usually don't expect!

    The card today is one such card.  The colours for their reception was "blues". 

    The idea for my card was one I cased from Pinterest.  It is quiet a simple easy card, but one with a bit of a "WOW".  Unfortunately, I am unable to give credit to the talented person who created the card as there was no name, but Thank You so much for your inspiration.


    Easy instructions for you to copy & print -

    Field Flowers "For the New Mr & Mrs"
     
     
    Until next time, Happy Stampin'
     

    Thursday, 15 November 2012

    Circle Circus.....

    .... meets Triple Time Stamping!

     I created this card for the challenge on Stampin' Fun & Friends, but was too late to enter it, so thought I would still share.  The challenge was to use Red, Green & Silver, but as I said, I was too late, so I left the Silver & added Chocolate Chip instead.

    Measurements -
    Base Card - Chocolate Chip - 8 1/4" x 4 1/8" or 21cm x 10.5cm
    Layer 1 - Whisper White - 5 5/8" x 3 7/8" or 14.5cm x 10cm
    Layer 2 - Chocolate Chip - 4 5/8" x 2 7/8" or 12cm x 7.5cm
    Layer 3 - Whisper White - 4 1/2" x 2 3/4" or 11.5cm x 7cm
    Layer 4 - Chocolate Chip - 3 5/8" x 2 1/8" or 9cm x 9.5cm
    Layer 5 - Whisper White - 3 1/2" x 2" or 8.5cm x 9cm

    Supplies -
    Stamp Set - Circle Circus, Petite Pairs
    Ink - Chocolate Chip, Riding Hood Red, Lucky Limeade
    Cardstock - Whisper White, Chocolate Chip
    Accessories - Snail Adhesive
    .
    To create your card, adhere the 3 pieces of Whisper White Cardstock  on top of each other using a  little bit of Temp Glue or Temp Snail Adhesive to the back.  I tend to use Snail Ahesive & then rub some of it off.

    Firstly, I stamped my sentiment on the top layer with Chocolate Chip Ink.  I then proceeded to stamp random images & colour of Lucky Limeade & Riding Hood Inks around the 3 layers.

    Once my stamping was complete, I carefully separatley the 3 layers & mounted them onto the corresponding Chocolate Chip pieces of Cardstock with Snail Adhesive.  I then carefully adhered them on top of each other ensuring that I had all my images matched as close as I could.

    I decided not to add any embellishment to the card as I didn't want to take away from the sentiment.


    Until next time, Happy Stampin'


    Sunday, 11 November 2012

    SC 067/12....

    What a great challenge we were set this week over at Sunny Challenges & Creations.  All we have to do is create a Shaker Card - NO layout!!!!!  If you are like me, then I haven't created one for so long that I can't remember the last time I did one.

    Measurements -
    Base Card - Chocolate Chip - 8 1/4" x 4 1/8" or 21cm x 15cm
    Layer 1 - Cherry Cobbler - 5 5/8" x 3 7/8" or 14.5cm x 10cm
    Layer 2 - DSP - 5 1/2" x 3 3/4" or 14cm x 9.5cm
    Layer 3 - Chocolate Chip - 3 1/4" x 3 1/4" or 8.5cm x 8.5cm
    Layer 4 - Very Vanilla - 3 1/8" x 3 1/8" or 8cm x 8cm
    Layer 5 - Window Sheet or Acetate - 3 1/8" x 3 1/8" or 8cm x 8cm

    Supplies -
    Stamp Set - Petite Pairs, Nature Walk
    Ink - Chocolate Chip
    Cardstock - Chocolate Chip, Cherry Cobbler, Very Vanilla
    DSP - First Edition Speciality
    Ribbon - 1/2" Seam Binding - Cherry Cobbler, Crochet Trim - Victoria
    Punches - 2 1/2" Circle
    Accessories - Snail Adhesive, Stampin' Dimensionals, Sticky Strip, Glimmer Brad - Champagne, Glass Stampin' Glitter - Gold (Retired), Stampin' Markers - Marina Mist & Old Olive, Mini Glue Dots

    I randomly stamped images over the DSP with Chocolate Chip Ink, prior to adhering to the Cherry Cobbler Cardstock.  I ran a piece of Cherry Cobbler Ribbon across the middle, tucked ends under & adhered to the Base Card with Snail Adhesive.

    For my window, I inked my image with Stampin' Markers - Old Olive & Marina Mist, stamped direct onto Very Vanilla, inked my sentiment in Chocolate Chip Ink & stamped onto the same piece of Very Vanilla Cardstock.  I placed my images onto the Cardstock, so that they would be able to be seen once I had adhered the top piece of Chocolate Chip Cardstock.

    As I didn't have any Double Sided Mounting Tape, I made my own.  I applied Sticky Strip all around the outer edge of my stamped piece of Very Vanilla Cardstock, ensuring that all sides were covered.  I cut 2 pieces of thick Cardboard - from the Glitter Paper - & adhered to the tops of the Sticky Strip, ensuring that all areas were covered as I didn't want any pieces of the glitter to escape, applied another layer of Sticky Strip, carefully poured Glitter onto my image - not too much as you don't want it to take over - punched a circle into the middle of the Chocolate Chip Cardstock with the 2 1/2" Circle Punch, adhered the Window Sheet to the wrong side & then finally to the top of the Sticky Strip.  I applied Stampin' Dimensionals to the back of this piece & adhered to the card.

    I tied a bow with the Cherry Cobbler Seam Binding, found 2 small pieces of Crochet Trim that happen to be in the same container as my Ribbon & decided to use them as well.  A Glimmer Brad was attached to the middle & finally adhered to the card with Mini Glue Dots.


    We hope you will jon us this week for this fun challenge.  Head over to Sunny Challenges & Creations to chek out what both Kris & Vicki have created, create your project, post to your blog or on line group & then link back with Mr Linky.  We would love to see your creation!

    Have a great week

    LinkWithin

    Related Posts Plugin for WordPress, Blogger...