Showing posts with label Cards - Thank You. Show all posts

Thursday, 25 July 2013

Thank You....

... to my lovely customers. 

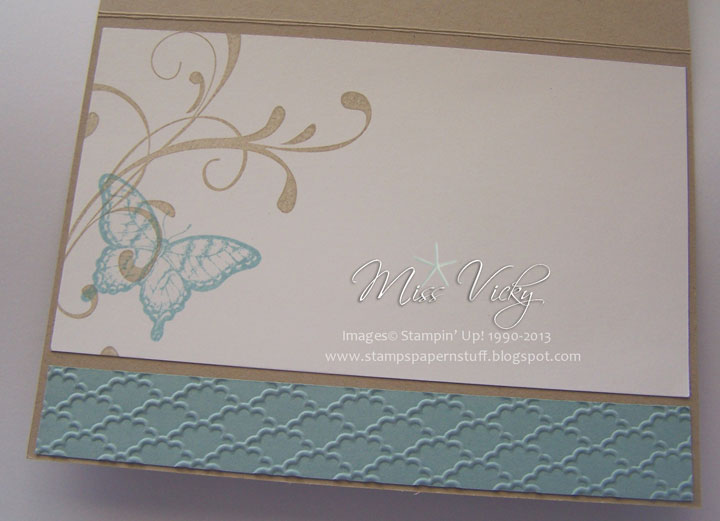
This is one of the Thank You Cards created for my customers this month.  I've used the gorgeous new "In Colours" to create the cards.  Mind you, they are all in different colours, but will show the remainder in the next couple of days.

I am really loving the new colours as they are right up my alley, ie being subtle & not too bright.  

The cards this month are a little smaller than the standard size, in that they are down a size & I am loving this size for small Thank You Cards.  No extra for postage either!

When I added the Ribbon, I hadn't realised it had retired, so you are able to replace the ribbon with a current one.  The secret is out - Yep, I haven't gone through my "stuff" as yet & sorted out the retired products.  That will have to be done today, so I don't do it again!

Measurements -
Base Card - Soft Suede - 5 1/2" x 7" or 14cm x 18cm
Layer 1 - Crisp Cantaloupe - 5 3/8" x 3 3/8" or 13.5cm x 8.5cm
Layer 2 - Very Vanilla - 5 1/4" x 3 1/4" or 13cm x 8cm

Supplies -
Stamp Set - Field Flowers - 122762, Express Yourself - (Hostess)
Ink - Baked Brown Sugar - 131174, Crisp Cantaloupe - 131176, Pistachio Pudding - 131177
Cardstock - Soft Suede - 119982, Crisp Cantaloupe - 131303, Very Vanilla - 106550
Edgelits - Adorning Accents - 125595
Embossing Folder - Adorning Accents - 125601
Ribbon - 1/8" Taffeta Ribbon - Very Vanilla (Retired)
Accessories - Big Shot - 113439, Snail Adhesive - 104332, Multipurpose Liquid Glue - 110755

Tutorial -
1.  Stamp random images onto Very Vanilla Cardstock using Pistachio Pudding Ink for the leaves & Crisp Cantaloupe for the flowers
2.  Stamp sentiment/greeting in Baked Brown Sugar Ink
3.  Place Edgelit along bottom of the longer piece of Crisp Cantaloupe Cardstock & run through Big Shot
4.  Line Embossing Folder with shaped edge from Edglit & run through Big Shot
5.  Adhere Very Vanilla to top part of Crisp Cantaloupe prior to adhering Ribbon along edge where 2 pieces meet.  Tie bow
6.  Adhere to Base Card - Soft Suede

How easy to create a lovely Thank You.  Don't you love the names of the new "In Colours"? 

  • To order Stampin' Up! products online, please Shop Here
  • Want to join my family, and be a part of a group that loves to stamp together, Join Here
  • To check out available classes or to attend any of the classes, please Click Here, click on the "Classes/Workshop" Page or email me vickiawright@bigpond.com
Until next time, Happy Stampin'
 
Vicky

Tuesday, 23 July 2013

Happy Birthday...

Our 3rd card from our May Card Class is the post today. 

Usually in my monthly Newsletter, I include a sketch & a layout for a scrapbook page.  I took the inspiration for the card from one of the newsletter.

Inside Card -
 
Card Front -  

Tutorial to create your own

 
  •  To order Stampin' Up! products online, please Shop Here
  • Want to join my family, and be a part of a group that loves to stamp together, Join Here
  • To check out available classes or to attend any of the classes, please Click Here, click on the "Classes/Workshop" Page or email me vickiawright@bigpond.com
Until next time, Enjoy!
 
Vicky

Saturday, 20 July 2013

Thank You....

Today's post is the 2nd card we created in our class in May.  I originally cased the card from Libby but did change it a little, including colours.

Inside Card -

Card Front -
 
Tutorial to create your card


  •  To order Stampin' Up! products online, please Shop Here
  • Want to join my family, and be a part of a group that loves to stamp together, Join Here
  • To check out available classes or to attend any of the classes, please Click Here, click on the "Classes/Workshop" Page or email me vickiawright@bigpond.com
Until next time, Enjoy
 
Vicky

Tuesday, 16 July 2013

Great Friend....

I love it when I get to use my favourite retired Stamp Sets once again. 

Our card today is one we created in our Crafty Creations class way back in March.  I did case this from someone, but I can't find the original card.  Please do let me know if you recognise it, so I can give you credit.  Thank you for your inspiration!

Inside Card -
 
Card Front -
 
Free Tutorial to print & create your own card -


Until next time, Happy Stampin'

Friday, 28 June 2013

Shaker Card....

We finally managed to create a "Shaker Card" today in Crafty Creations.  A lot of laughs & giggles as everyone's was different!  Isn't it amazing how we all have the same kit, yet create something entirely different - which I don't mind, as I think it is great that so many people can create a different card from the one next to them.

One of the ladies loaned me a magazine some time ago so that we could have a go at doing one of these cards.  I've had this card sitting in my "Crafty Creations" box for some time & finally managed to get it completed.  There are weeks that I am usually about 3 weeks ahead, BUT there are weeks where I am quickly creating the card the morning of the class.

The jury is still out on this card.  I love the products I used to create it, but I think if I was to do it again, I would add another layer.  It is very hard for me to create single layers - I always feel like there is something missing.

I don't have a tutorial today as I've posted this card off in the mail sometime ago.

Inside card -

 Card Front -
 
Until next Time, Happy Stampin'
 
Vicky

Sunday, 23 June 2013

SC 082/13...

Our challenge over at Sunny Challenges is to create a project using the sketch as well as retiring Stampin' Up! product.  To play along, all you have to do is check out that long Retiring List.

As the sketch is wide open, I thought I would try something a little different with my card this week.  In fact I enjoyed this fun technique that it is going to be included in our Technique Class next month.

I remember seeing a card which was using a tile technique on Pinterest, but as usual didn't take much notice or didn't save it, thinking I would not be using it, but it did stick in my mind.  Thank you so much for your inspiration.

After playing around for a little time, I eventually come up with something that I was happy with.

Not only did I do this for the challenge, but I also created a couple to post off to a couple of customers this month - different colours of course, but will show you them at a later stage.

Retiring Products I've used included -
Stamp Set - Nature Walk
Cardstock - Baja Breeze
Ink - Baja Breeze
SU! Write Markers - Baja Breeze, Certainly Celery

I am really going to miss the Stamp Set - Nature Walk, but no doubt SU! will have something better.

Baja Breeze -
 
Bashful Blue -
 
Don't forget to pop on over to Sunny Challenges & check out what both Kris & Carole have created using the sketch & retiring products.
 
You have 2 weeks to create your project.  We love seeing your work & leaving comments, so be sure to link it back with Mr Linky.
 
Until next time, Happy Stampin'
 
Vicky

Tuesday, 9 October 2012

Faux Woodgrain....

meets Field Flowers.
This is the 2nd card we created in our Technique Class last Sunday.  Yep, the colours are very bright but I wanted to createa female's card using this fantiastic Technique - Faux Woodgrain or Faux Wood....
 
I had started this card a couple of weeks ago, but has I was finishing it a couple of days prior to the class, my head went in a different direction to what I had started out with.
 
To do our frame, I used exactly the same ink colours as can be seen on our first card for this class.
 
I think adding the Melon Mambo & Whisper White to the card gave the card a truely femine touch.


Until next time, Happy Stampin'


Sunday, 23 September 2012

SC 06012...

Our challenge this week was set by Gwen.  Along with the sketch we have to use Embossing on our cards, ie Heat Embossing or Dry Embossing using your Big Shot & Embossing Folders or any other Embossing that you may like to try.

I've been playing with colours the last couple of weeks & decided to go ahead with one of the combinations I found I really liked. 

Measurements -
Base Card - Whisper White - 8 1/4" x 4 1/8" or 22cm x 15cm
Layer 1 - Basic Gray - 5 3/4" x 4" or 14.5cm x 9.5cm
Layer 2 - Whisper White - 5 5/8" x 3 7/8" or 14cm x 9cm
Layer 3 - Not Quiet Navy - 1" x 5 5/8"

Supplies -
Stamp Set - Perfect Punches, Nature Walk, French Foliage, Established Elegance
Ink - Baja Breeze, Marina Mist, Basic Gray, Not Quite Navy
Cardstock - Whisper White, Basic Gray, Not Quite Navy
Ribbon - 5/8" White Organza
Punches - Scallop Trim Border, Scallop Oval
Embossing Folder - Vimtage Wallpaper
Accessories - Stampin' Up! Dimensionals, Tombow Multipurpose Glue, Snail Adhesive, Big Shot

I randomly stamped my images onto the smaller piece of Whisper White Cardstock using Basic Gray, Baja Breeze, Marina Mist & Not Quite Navy Inks.  The whole piece was put through the Big Shot using Embossing Folder - Vintage Wallpaper.

I punched along both sides of the piece of Not Quite Navy Cardstock with the Scallop Trim Border Punch, adhered the ribbon along the middle, tucked the ends under & tied a knot.  This whole piece was then adhered to the piece of Basic Gray Cardstock & finally to the Base Card - Whisper White.

I stamped the wording onto a scrap piece of Whisper White Cardstock with Not Quite Navy Ink, punched with the Scallop Oval Punch & adhered to the card with Stampin' Dimensionals.


Don't forget to hop on over to Sunny Challenges & Creations to check out what the other girls have created.  This is the perfect time to dig out those Heat Tools or your Big Shot & join us this week for this fun challenge.

Until next time, Happy Stampin!

Sunday, 16 September 2012

SC 059/12...

We have a great challenge beginning today over at Sunny Challenges & Creations.  Along with the sketch, we are to create an Easel Card.  I love making these, but don't do them often enough.
Not sure on how to create this type of card, then click onto tis link & it will take you straight there - http://www.splitcoaststampers.com/resources/tutorials/easelcard/

I started out with the design in mind of a certain stamp set.  After grabbing all my supplies & colours which I thought would really suit the set, couldn't find the set I wanted.  After searching for about 10m, suddenly realised I don't have that stamp set.  Does this happen to anyone else????

Measurements -
Easel -
Base - Crumb Cake - 8 1/4" x 4 1/8" or 22cm x 15cm - Score at 4 1/8" & 2'

Card Front -
Layer 1 - Crumb Cake - 4 1/8" x 5 7/8" or 15cm x 10.5cm
Layer 2 - Raspberry Ripple - 3 7/8" x 5 5/8" or 14cm x 9.5cm
Layer 2 - DSP - 5 5/8" x 2 1/2" or 9.5cm x 6cm
Layer 3 - Perfect Plum - 5 5/8" x 1" or 9.5cm x 2.5cm

Inside -
Layer 1 - Very Vanilla - 4" x 5 3/4" or 14.5cm x 11cm
Laer 1 - Perfect Plum - 1" x 4" or 2.5cm x 14.cm
Layer 2 - DSP - 1" x 4" or 2.5cm x 14cm

Supplies -
Stamp Set - Field Flowers, Because I Care (Retired), French Foliage
Ink - Raspberry Ripple, Crumb Cake, Perfect Plum, Gumball Green
Cardstock - Crmb Cake, Perfect Plum, Raspberry Ripple, Very Vanilla
DSP - First Edition Speciality
Punches - Dotted Scallop Border, Word Label, Modern Label
Accessories - Snail Adhesive, Stampin' Dimensionals

For the front panel of my card, I adhered the large piece of Raspberry Ripple onto the single piece of Crumb Cake Cardstock with Snail Adhesive.

I stamped my images randomly onto the piece of DSP using Gumball Green, Raspberry Ripple & Perfect Plum Inks.  I punched along the edge of the piece of Perfect Plum Cardstock with the Dotted Scallop Border Punch, adhere it to the bottom of the DSP, prior to adhering to the front of the card.

I stamped the small image onto a scrap of Very Vanilla Cardstock in Perfect Plum Ink, cut around & adhered it to the bottom left hand corner of the card with Stampin' Dimensionals.  The large flower was completed the same way.

The whole piece was adhered to the Easel Base with Snail Adhesive.

For my Easel Base, I adhered the piece of Very Vanilla Cardstock to the bottom of the Crumb Cake with Snail Adhesive, then punched along the edge of the Perfect Plum with the Scallop Dotted Border Punch, adhered to the DSP & finally to the bottom of the Very Vanilla Cardstock.

With Perfect Plum, Raspberry Ripple & Gumball Green Inks, I stamped the images direct onto the DSP allowing some of the images to go onto the piece of Very Vanilla Cardstock.

My greeting was stamped onto a scrap of Very Vanilla Cardstock in Perfect Plum Ink, punched with the Word Label Punch & then to a piece of Raspberry Ripple Cardstock which had been punch with the Modern Label prior to adhering to the bottom of the card with Stampin' Dimensionals.


We hope you will join us this week.  Don't forget to pop on over to Sunny Challenges & Creations & check out what GwenKris and Christine have created.  These are fun cards to create!
 
Until next time, have a great week
 

Thursday, 21 June 2012

Technique Class....

One of our techniques last sunday arvo was the "Reverse Spotlighting".  what a fun, fun technique & we all enjoyed creating this card.  Not only was the technique used on the card, but we created an "Easel Card" as well.

Bottom of Easel...

Aren't the colours gorgeous on this card.  This is the first time, this stamp set has been inked, but think it will be seeing a lot more ink somehow, as it stamps such beautiful images.

Have a great day!


Thursday, 7 June 2012

Thank You...

I did mention previously that I was way behind in my posting, so I am going to try & catch up, but the hard part is thinking what cards I have created & where they are - have I already posted them, given them away????

The card today is one we created at my Friday's Volunteer Class.  We had lots of fun with this card, but I was a little cruel to the ladies.  I actually forgot to take my punch, so had to quickly make up a couple of pages of different size hearts on the computer so they could complete their card.

Measurements -
Base Card - Very Vanilla - 8 1/4" x 4 1/8" or 21cm x 15cm - Scored in the middle & folded in half
Layer 1 - DSP - 3 7/8" x 5 5/8" or 14cm x 10cm
Layer 2 - Soft Suede - 4 3/4" x 2" or 12cm x 5cm
Layer 3 - DSP - 4 5/8" x 1 7/8" or 11.5cm x 4.5cm

Supplies -
Stamp Set - Short & Sweet
Ink - Blushing Bride, Soft Suede

Inside Card...
Cardstock - Very Vanilla, Soft Suede
DSP - IN Colours DSP
Ribbon - Crochet Trim - Chantilly
Punches - Full Heart, Oval, Scallop Oval
Brad - Antique Brads
Accessories - Mini Glue Dots, Sponge Daubers, Snail Adhesive, Tombow Multipurpose Glue

I grabbed my Sponge Dauber & inked around the edges of the large piece & small piece of DSP with Soft Suede Ink.  The large piece was adhered to the Base Card - Very Vanilla, while the smaller piece of DSP was adhered to the piece of Soft Suede Cardstock using Snail Adhesive.

Using the Full Heart Punch, I punched 20 hearts from the IN Colours DSP, sponged my Dauber around each heart with Soft Suede Ink, applied a small amount of Tombow Multipurpose Glue to the bottom part of the hearts & adhered them together ensuring that they were stacked on top of each other.  I made the flower so that it had 4 hearts for the base of the flower & then built on these 4 flowers.  In total you should have 5 layers on each heart.

Using my Bone Scorer, I turned up the edges of each petal to give the flower a little "character".

I tied a double bow from the Crochet Ribbon, wrapped the Brad around the middle pror to adhering to the middle of the flower using a Mini Glue Dot.  The flower was then applied to the Base Card with a couple of Mini Glue Dots.

The sentiment was stamped onto a scrap piece of Very Vanilla Cardstock with Blushing Bride Ink, punched with the Oval Punch, sponged around the edges with Soft Suede Ink, adhered to a piece of Soft Suede Cardstock which had been punched with the Scallop Oval Punch & adhered to the Base Card.

Until next time, Happy Stampin'

Sunday, 20 May 2012

SC 04112...

Our challenge over at Sunny Challenges & Creations proved a lot harder for me than I thought it would.  I had an idea in my mind from the first time I saw the sketch, but when it come to creating it, well that idea went out the window & I ended up just winging this one.

The challenge was brought to us by Kris in the way of the sketch & using current "In Colours"

Measurements -
Base Card - Whisper White - 8 1/4" x 4 1/8" or 21cm x 15cm
Layer 1 - Wisteria Wonder - 5 3/4" x 4" or 14.5cm x 10cm
Layer 2 - Whisper White - 5 5/8" x 1 7/8" or 14.5cm x 5cm
Layer 3 - DSP - 5 5/8" x 2 1/8" or 14.5cm x 5.5cm

Supplies -
Stamp Set - Delicate Doilies, Short & Sweet
Ink - Wisteria Wonder, Blushing Bride
Cardstock - Whisper White, Wisteria Wonder
DSP - In Colours
Ribbon - 3/8" Ruffled - Wisteria Wonder
Punches - Modern Label, 2 1/2" Circle
Accessories -  Snail Adhesive, Basic Pearls, Stampin' Dimensionals, Tombow Multipurpose Glue

Inside...
I randomly stamped an image from Delicate Doilies using both Wisteria Wonder & Blusing Bride Inks.

I adhered the piece of DSP to the RHS piece of Wisteria Wonder Cardstock & then the stamped piece of Whisper White Cardstock using Snail Adhesive.  This piece overlapped the piece of DSP a little so that I wouldn't have a space down the middle.

Ribbon was adhered along the bottom part of the Cardstock using Snail Adhesive, tucked the ends under & tied a bow.

I stamped the sentiment onto a scrap piece of Whisper White Cardstock with Wisteria Wonder Ink, punched out with the Modern Label Punch, applied 2 small Basic Pearls, one each side, added a couple of Stampin' Dimensionals & adhered to the bottom RHS side of the card.

The whole piece was adhered to the Base Card - Whisper White with Snail Adhesive.

For my centre piece, I stamped the image 3 times onto a scrap piece of Whisper White Cardstock, and once onto another piece.  The last piece was punched using the 2 1/2" Circle Punch.  I realised that I don't use this punch nearly enough!  This large punched piece was adhered to the card with Tombow Multipurpose Glue.

With the 3 stamped images, I cut around them at different areas of the stamp.  I did confuse myself a little here as I wasn't too sure where I was going, but the idea had been in my head since seeing this stamp set & finally got to do it!

The 3 images were then layered on top of each other using Stamping Deimensionals.  I applied a Basic Pearl to the centre to finish it off.

I love the Ruffled Ribbon from Stampin' Up!  Another item I don't use enough of.

I'm really happy with the card & the soft look it has.  I think this stamp set calls for a soft delicate look.

Now it is your turn to pop over to Sunny Challenges & Creationsto check out what Gwen Kris & Tanya have created, as well as our weekly guest designers.  Create your project using the challenge & link back with Mr Linky.

Until next time, happy stampin'


Sunday, 13 May 2012

SC 040/12...

Happy Mother's Day to all the mums of the world!  Hope you all have a great day & get spoilt rotten!

Our new weekly challenge over at Sunny Challenges & Creations starts today.  This week we have only the sketch to go by.  Gwen has been very easy on us!

I started out with a completely different card in mind, had it all made up in my head & then blow me down if I couldn't find the stamp set.  I then convenienced myself that I didn't even have the set I wanted to use!  The final result turned into a very quick 5 minute card, but these are good to do.

In fact, this card is going in the mail today!

Measurements -
Base Card - Chocolate Chip - 8 1/4" x 5 7/8" or 21cm x 15cm - Scored in the middle & folded in half
Layer 1 - DSP - 5 1/2" x 3 7/8" or 14cm x 10cm
Layer 2 - Chocolate Chip - 2 1/2" x 2" or 6.5cm x 5.5cm
Layer 3 - DSP - 2 3/8" x 1 7/8" or 6cm x 5cm
Layer 4 - Chocolate Chip - 4 1/2" x 1 7/8" or 11.5cm x 5cm
Layer 5 - Whisper White - 4 3/8" x 1 3/4" or 11cm x 4.5cm

Supplies -
Stamp Set - Forever Young, A Word for You
Ink - Chocolate Chip, Pool Party
Cardstock - Chocolate Chip, Pool Party, Whisper White
DSP - In Colours DSP
Punches - Modern Label
Accessories - Snail Adhesive

I adhered the smaller piece of DSP to the small piece of Chocolate Chip Cardstock prior to adhering to the large piece of DSP & then to the Base Card - Chocolate Chip.

I stamped my greeting onto a scrap piece of Whisper White Cardstock in Chocolate Chip Ink, punched using the Modern Label Punch &adhered to the DSP with Snail Adhesive.  My image was stamped direct onto Whisper White Cardstock with Pool Party Ink & adhered to the long piece of Chocolate Chip Cardstock & then to the Base Card.

As I said a very easy 5 minute card!

I hope you can join us this week over at Sunny Challenges & Creations as we would love to see what you come up with using the sketch.

What some inspiration????  Then why not pop over & see what Gwen, Kris & Tanya have created as well as our very talented Weekly Guest Designers.  They are fantastic!!!!!!

Until next time, Happy Stampin'

Sunday, 4 March 2012

SC 03012...

Do you ever have an idea in your head but doesn't atter what you do it just never seems to end up how you pictured it the same on paper.  This is what happened to the card I created for today's challenge over at Sunny Challenges & Creations  Now that it is finally finished, I am  really happy with, but I must confess it has taken me a couple of days as I kept stopping & starting.  In fact I created 2 cards, but like this one the best.

Today's challenge is brought to us by Libby  Buttons are to be used on our sketch this week!

I created my own Buttons for this card, only because the real buttons look a little too bit for the card.....

Measurements -
Base Card - Basic Black - 8 1/4" x 4 1/8" or 21cm x 15cm - scored in half & folded down middle
Layer 1 - Whisper White - 5 3/8" x 3 3/4" or 13.5cm x 9.5cm
Layer 2 - Real Red - 5 1/4" x 3 5/8" or 13cm x 9cm
Layer 3 - Whisper White - 4 3/4" x 1 7/8" or 12cm x 5cm

Supplies -
Stamp Set - Fabulous Florets, Short & Sweet
Ink - Real Red, Basic Black, Versamark
Cardstock - Whisper White, Real Red, Basic Black
Ribbon - 1/4" Grosgrain Ribbon - Real Red
Punches - Scallop Oval, Large Oval, Itty Bitty Set - Flower
Accessories - Bone Folder, Crystal Effects, Heat Tool, Embossing Powder - Clear & Basic Black, Mini-Glue Dots, Paper Piercing Tool, Rhinestones, Embossing Buddy, Snail Adhesive
Non-SU - Ruler
Techniques - Heat Embossing, Scoring & Faux Buttons

Faux Buttons
Make a button template using Whisper White Cardstock, piece 2 holes in the middle with your Paper Piercer & set aside
Using the small Flower Punch from the Itty Bitty Punch set, punch 4 flowers in Whisper White & 2 in Basic Black
Create 2 buttons by adhering 2 of the Whisper White Flowers together, paper piece the holes, using your button template & apply Crystal Effects over the top
Repeat same steps to create the 2nd Whisper White Flower Button & the Basic Black Flower Button
Set all 3 aside to dry - this may take a couple of hours\

Card -
Score Real Red Cardstock at 1/2" intervals diagonally with a Ruler & Bone Folder, turn 180 deg & repeat
Adhere this piece to Whisper White & finally Base Card - Basic Black with Snail Adhesive
Rub Embossing Buddy over small piece of Whisper White, stamp image onto card with Versamark, pour Basic Black Embossing Powder over top, tap excess back into jar & heat set with Heat Tool
Repeat above step onto a scrap of Whisper White, except use Real Red Ink instead of Basic Black.  Cut around flower image & set aside
Ink flower image with Versamark & then Real Red
Stamp inked image direct onto scrap piece of Whisper White
Clean stamp & repeat above step for 2nd flower
Adhere the embossed piece of Card to the Base Card
Adhere the 2 Real Red flower images to the top of the embossed black image using Stampin' Dimensionals in between flowers & to adhere to the Base
Adhere the cut out red flower image over the top of the black embossed image with Stampin' Dimensionals
Tie a small bow with Real Red Grosgrain Ribbon & adhere to the card with Mini-Glue Dots
Stamp your sentiment with Basic Black Ink onto a piece of scrap Whisper White
Punch with Large Oval Punch & adhere to punched Basic Black which has been punched with the Scallop Oval Punch
Adhere to the LHS of card with Snail Adhesive
Adhere your Faux Buttons to the card using Mini-Glue Dots

We're very excited over at Sunny Challenges & Creations as this week is the start of a new month & therefore, a new Guest Designer. It also sees some of our past entries who received the Ray of Sunshine join us for a week in designing samples too. It is our way of saying a big thank you for supporting our challenges each week.

Be sure to join us for this challenge.

Happy Stampin'

LinkWithin

Related Posts Plugin for WordPress, Blogger...