Showing posts with label Technique - 2-Step Stamping. Show all posts

Friday, 19 July 2013

Sending Sympathy....

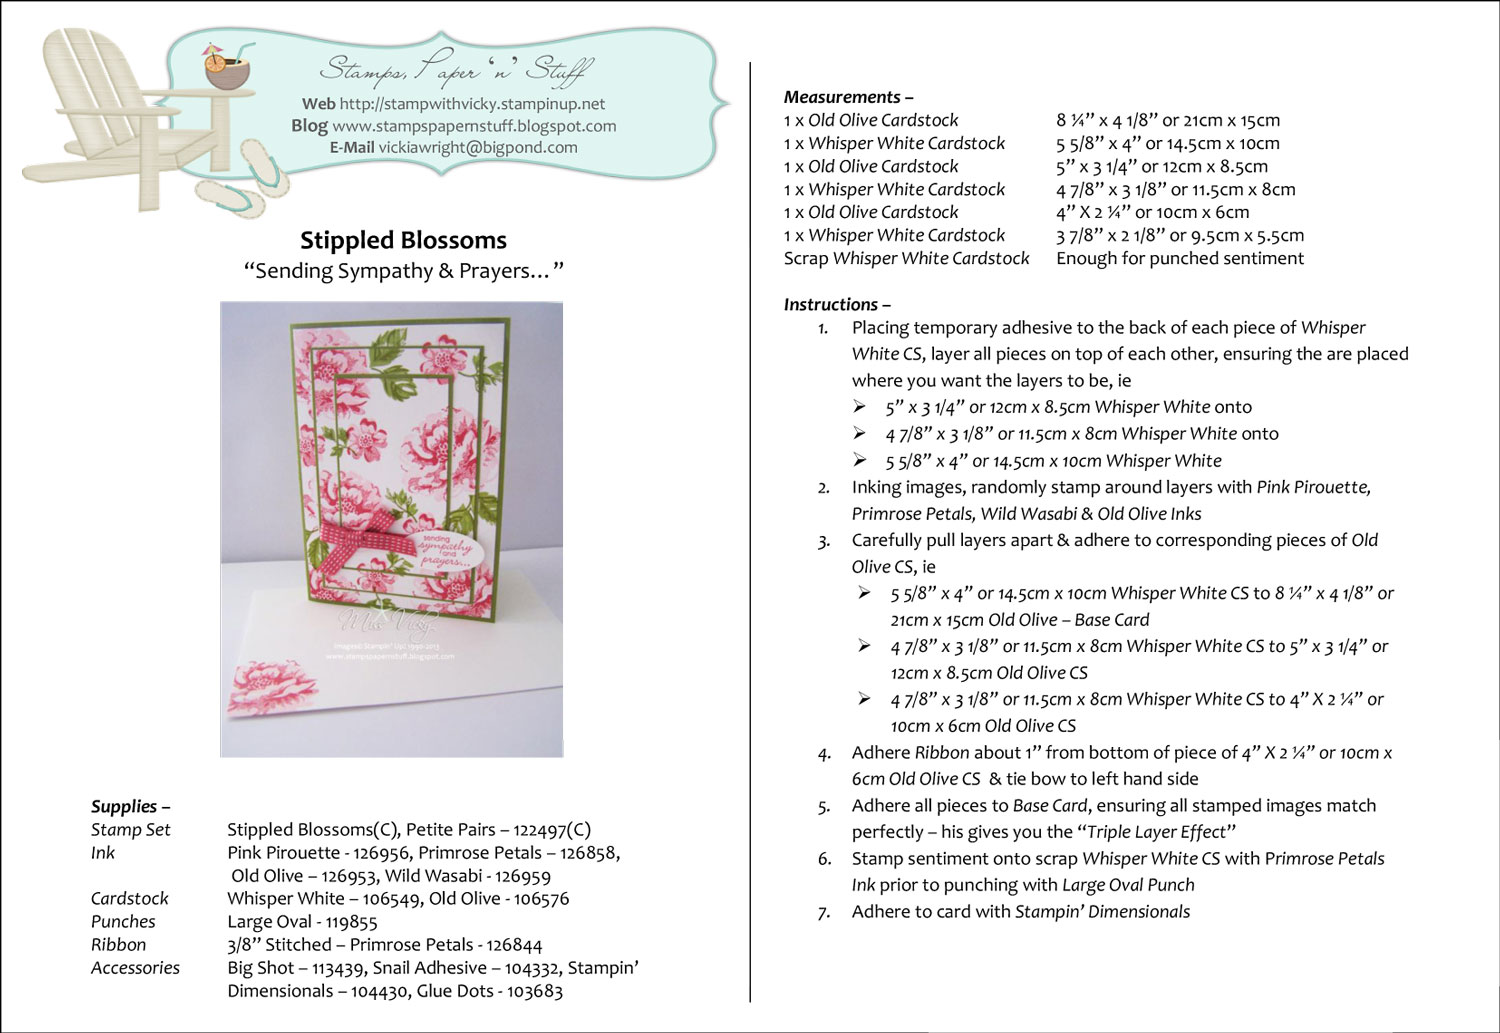
Our card today is a Triple Layer Card we created in Crafty Creations at the Caloundra Community Centre this afternoon.   The ladies loved it, although we did have a few accidents - ink accidents, ie....

Not only could your imagination go wild thinking of different placements for the front, but they are an easy card to create as well as having a every effective card at the end.

I don't usually create bright cards, but tend to use the Neutral & Subtle Colour Families.  When doing classes I like to think "outside the square", so to speak which means I tend to take into account what each person likes including colours & styles. It would be a very boring world if we liked all the same, wouldn't it?

Supplies used to create this card -
Stamp Set  -  Stippled Blossoms (C) - 126747, Petite Pairs(C) - 122497
Ink  -  Pink Pirouette - 126956, Primrose Petals - 126858, Old Olive - 126953, Wild Wasabi - 126959
Cardstock  -  Whisper White - 106549, Old Olive - 106576
Punches  -  Large Oval - 119855
Ribbon  -  3/8" Stitched - Primrose Petals - 126844
Accessories  -  Big Shot - 113439, Snail Adhesive - 104332, Stampin' Dimensionals - 104430, Glue Dots - 103683
 
 
Don't forget to click on the link below so that you can print & save the instructions to create your own Triple Layer Card


  •   To order Stampin' Up! products online, please Shop Here
  • Want to join my family, and be a part of a group that loves to stamp together, Join Here
  • To check out available classes or to attend any of the classes, please Click Here, click on the "Classes/Workshop" Page or email me vickiawright@bigpond.com
Until next time, Happy Stampin'
 
Vicky

Monday, 28 November 2011

2nd Calender...

I am a day late in posting my 2nd calender, but better later than never.  This one is a little different from the one posted 2 days ago.

I randomly stamped images over the pages of the calender using Riding Hood Red & Baja Breeze Inks.  Ensuring all pages were squareed away nice & evenly, using my Handheld Punch, I punched 3 holes into the top of the calender about 1.5cm from each end & 1 cm down from the top.  I applied 3 White Brads through the holes & adhered to the piece of A4 Whisper White Cardstock which had been adhered to a piece of Cardboard from the DSP Papers with Sticky Strip.

I created the background for the top of my calender by stamped random images onto Whisper White Cardstock using Riding Hood Red & Baja Breeze Inks.

The stamp set is a 2-step stamp set, but for the background, I only used the outline stamp.  I wanted the background to be sort of clean looking.

Deciding that I wanted my 3-D flowers to filled in, I used both the outline & the filler stamps to create my flowers to be adhered over the background.

I stamped 3 large flowers onto Whisper White Cardstock using Baja Breeze Ink, cut them out & adhered over the stamped images using SU Dimensionals.

I stamped a number of smaller flowers onto Whisper White Cardstock using Riding Hood Ink, cut around the images & again adhered randomly to the stamped images using SU Dimensionals.

Using the Boho Blossoms Punch, I punched 3 flowers with Baja Breeze Cardstock, adhered to the centre of the larger flowers with Crystal Effects & adhered Basic Pearls to all the centres of the 3-D flowers.

This piece was adhered to a piece of Riding Hood Red with Sticky Strip & finally to the top of the calender.

Supplies -
Stamp Set - Flower Fancy
Ink - Baja Breeze, Riding Hood Red
Cardstock - Whisper White, Riding Hood Red, Cardboard from DSP Papers
Punches - Boho Blossom, Handheld Punch
Accessories - Crystal Effects, Sticky Strip, Basic Pearls, SU Dimensionals


Until next time, Enjoy!

Wednesday, 24 August 2011

SSC 217...

I am in the middle of doing Wedding Reception Stationery so shouldn't really be doing any cards, let along attempt sketches, but while the paint is drying, the mouse will play.  Anyhow, I have to make the bride & groom a "Congratulations" Card, so this is a good excuse!

This card has been created for the challenge over at Stamping 411 I finally inked a stamp set which has been sitting on my shelf for a little time now.  After seeing it in ink, I now have a million ideas to use it, but alas as it is a Hotess Set, so will be retiring at the end of the month.

This week Stamping 411 not only have 2 sketches but they have a "Contest" so to speak.  The winner will receive a FREE Level 3 Hostess Set from the previous Idea Book & Catalogue - "Playful Pieces". 

If I get the time, I will attempt to have a go at the other sketch too, as a few ideas popped into my head while making the card for #2 sketch

As always, measurements have been supplied for us -

Base: 11 x 4 1/4", scored and folded in half at 5 1/2" - Basic Black
Layer 2: 5 x 3 3/4"  - Riding Hood Red
Layer 3: 4 7/8" x 3 5/8"  - DSP
Layer 4: 3 1/8" x 4 1/8" - Basic Black
Layer 5: 3x4" - Very Vanilla
Layer 6: Ribbon or cardstock
Layer 7: ANY shape punch

I stamped my images direct onto Very Vanilla Cardstock using Basic Black Ink.  Thinking I would try something a little different & not do the 2-step stamping technique onto the image, I coloured the images using my Aqua Painter, Riding Hood Red & Crumb Cake Inks.  I think it come out ok.  I very roughly coloured the images, as I think the stamp set calls for that, not to keep your colouring within the lines, so to speak!

I put the card through the Bigshot using Embossing Folder - Perfect Polka Dots, layered it to Basic Black, then to DSP & then to Riding Hood Red Cardstock.  A piece of Ribbon was adhered across the bottom about 1/4 way up & a bow tied.

I stamped my sentiment using Basic Black Ink onto Very Vanilla, punched using Oval Punch & run it through the Bigshot, again using the same Embossing Folder.  The piece was then adhered to a piece of Crumb Cake Cardstock which had been punched using the Scallop Oval Punch.  I adhered to the card using SU Dimensionals.

The whole piece was then adhered to the Base Card - Basic Black.

For my inside, I did the 2-Step Stamping Technique using Basic Black, Riding Hood Red & Crumb Cake Inks onto Very Vanilla, adhered to layer of Riding Hood Red Cardstock & then to the Base Card.

What looks like a hard sketch, is really a great one to do!


Supplies -
Stamp Set - Fast & Fabulous, Oval All
Inks - Basic Black, Riding Hood Red, Crumb Cake
Cardstock - Very Vanilla, Crumb Cake, Riding Hood Red, Blasic Black
DSP - Love Letter
Embossing Folder - Perfect Polka Dots
Punches - Oval, Scallop Oval
Ribbon - 1/8" Taffeta - Basic Black
Accessories - SU Dimensionals, Bigshot, Snail Adhesive, Aqua Painter

Until next time, Enjoy!


Saturday, 6 August 2011

TSSC 185...

Trying to use up more of my stash of DSP & stamps before they retire.  This card is taken from the sketch of Mary-Jo's  I went with a stamp set that I really adore but have only used it probably once or twice - shame on me! 

Base Card - Very Vanilla - 5 7/8" x 4 1/8" or 15cm x 10.5cm
Layer 1 - DSP - 3 1/2" x 5" or 9cm x 13cm
Layer 2 - Basic Gray - 5 7/8" x 1 3/4" or 15cm x 4.5cm
Layer 3 - DSP - 5 7/8" x 1 5/8" or 15cm x 4cm
Layer 4 - Basic Gray - 1 3/4" x 4 1/8" or 4.5cm x 10.5cn
Layer 5 - DSP - 1 5/8" x 4 1/8" or 4cm x 10.5cm
Layer 6 - Baja Breeze - 3 1/8" x 2" or 8cm x 5cm
Layer 7 - Very Vanilla - 3" x 1 7/8" or 7.5cm x 4.5cm

I stamped my image onto the Very Vanilla Cardstock using Soft Suede Ink.  Inking my solid flower image with Soft Suede Ink, I stamped off twice & then stamped over the top of the first image - 2-Step Stamping!  I then randomly stamped 3 flower outlines in Soft Suede Ink around the card & stamped the solid images using Baja Breeze Ink.  I didn't stamp off with this ink as it is a very soft colour anyhow.  This piece was adhered to the Baja Breeze Cardstock.

Using my Scallop Trim Border Punch, I punched along the edge of the shorter piece of Basic Gray Cardstock & adhered the matching piece of DSP on top.  I then adhered the longer piece of DSP to the longer piece of Basic Gray Cardstock.

I adhered the larger piece of DSP to the base card followed by all the layers - as per the sketch.  I applied SU Dimensionals to the back of the Baja Breeze Cardstock before adhering to the card.  I placed Basic Pearls to the centre of the flowers as well as down the RHS of the card.

When I first looked at the sketch, I thought "No, too much, not doing it!"  But boy am I glad I did.  I think the card made up really lovely & soft, but you be the judge.


Supplies -
Stamp Set - Flower Fancy
Ink - Soft Suede, Baja Breeze
Cardstock - Very Vanilla, Baja Breeze, Basic Gray
DSP - Elegant Soiree
Punches - Scallop Trim Border
Accessories - Snail Glue, SU Dimensionals, Basic Pearls

Until next time, Enjoy!

Saturday, 15 May 2010

Thank You...

G'Day Stampers,

I have a Sketch for you found over at http://cornwallcraftystampchallenge.blogspot.com so go check it out.  It is # 58 & this is my card from the sketch.


Supplies -
Stamp Set - Flower Fancy, Short n Sweet
Ink - Pretty in Pink, Certainly Celery
Cardstock - Almost Amethyst, Certainly Celery, Pretty in Pink, So Saffron
DSP - Tea Party
 
Accessories - Snail Adhesive, 2-Way Glue, Dazzling Diamonds,
Pretties Kit, Grosgrain Ribbon - Pretty in Pink

Until next time, Enjoy!


LinkWithin

Related Posts Plugin for WordPress, Blogger...