Showing posts with label Cards - Baby. Show all posts

Friday, 24 January 2014

Zoo Babies...

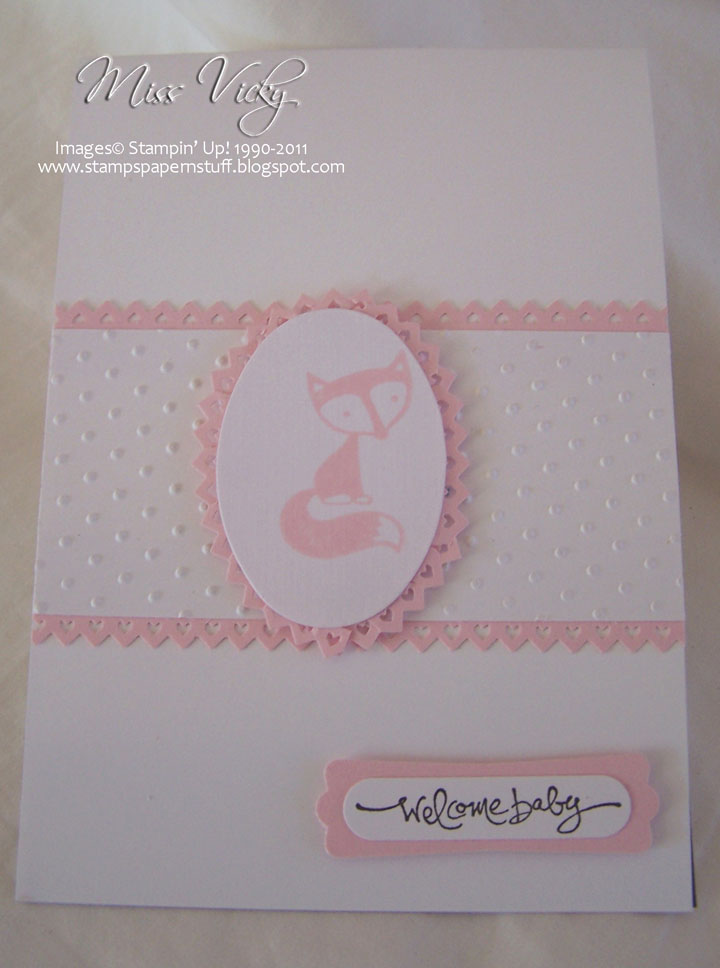
I've loved this cute little stamp set since I laid eyes on & have only just managed to ink it up now.  Shame on me!
 
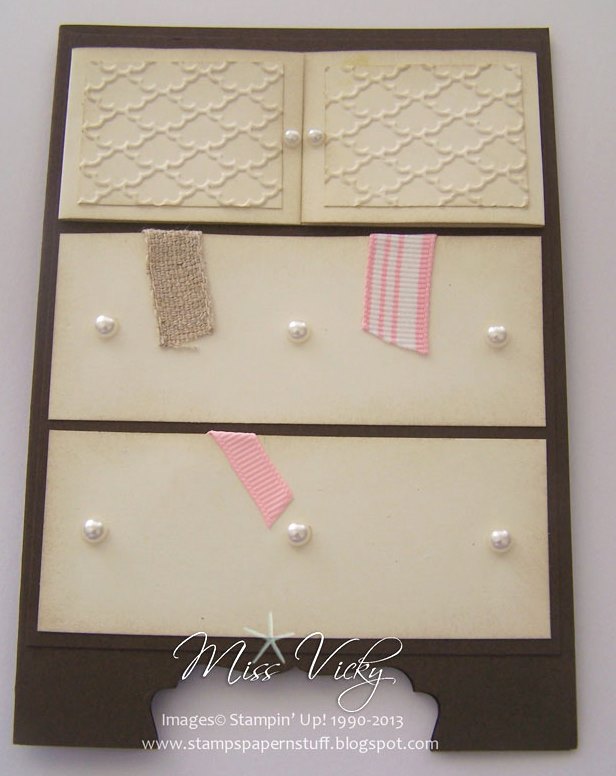
Today's card is one we created in our Friday's Crafty Creations Class.  As usual, I CASEd my card for today.  You can see the original on Pinterest.  I changed my up a little using all SU! Products, but the class did actually use the Embossing Folder which is on the original card.  Thank you so much for your inspiration.
 
I've also used the gorgeous new Embossing Folder - Decorative Dots - which is a FREE item you are able to earn in the upcoming Sale-A-Bration, starting Tuesday, 28 January.  All you have to do is spend $90.00 AUD (excluding P&H).  Contact me for more details!
 
Supplies –
Stamp Set  - Zoo babies - 130456
Ink - Wisteria Wonder – 126985, Sahara Sand - 126976
Cardstock - Whisper White - 106549, Wisteria Wonder - 124389
Embossing F - Decorative Dots – 133250 (SAB 2014), Decorative Frames - 123130
Punches - Modern label – 119849, Word Window – 119857
Ribbon  - Wisteria Wonder, Whisper White - Retired
Accessories  - Snail Adhesive – 104332, Stampin’ Dimensionals – 104430, Rhinestone Basic Jewels – 119246, Glue Dots - 103683
 
Inside Card -
 
Card Front -
 
Click on the link below to print your Tutorial
 
  •  To order Stampin' Up! products online, please Shop Here
  • Want to join my family, and be a part of a group that loves to stamp together, Join Here
  • To check out available classes or to attend any of the classes, please Click Here, click on the "Classes/Workshop" Page or email me vickiawright@bigpond.com
Until next time, Happy Stampin'


Monday, 30 September 2013

SC 089/13...

It was my turn to set the challenge this week at Sunny Challenges & Creations.  I went with the theme of "BABY".

This could be anything from cards, 3-D Projects or even a Scrapbook page.  In fact I very nearly did a page, but my mind went blank at the last moment.  I even had a hard time creating my card for the challenge.  Do you ever get something in your mind, knowing that it is all wrong, but not knowing where to go?  This happened to me. 


Once I had finished my card, I suddenly realised that I had created the whole card on top of my catalogue which was opened at the page the stamp set appeared on.  I am just lucky that I didn't get glue, etc all over the page......

My card is a little different as I don't really have any "baby" stamps, except for my wheel.  As bicycles seem to be popular at the Handmade Expo I attend, I thought it perfect timing to catch up on  my baby cards.

For the inside of my card, I cut a piece of Whisper White Cardstock back to 5 1/2" x 3 3/4" or 14cm x 9.5cm & adhered to the inside Base Card.  I cut an upside down "V" into a 3/4" x 5 1/2" or 2cm x 14cm piece of DSP  to form a pennant shape & adhered to top of Whisper White Card.


Supplies -
Stamp Set - Timeless Talk - 126607, Teeny Tiny Sentiments - 120024
Ink - Rose Red - 126954
Cardstock - Whisper White - 106549, Pink Pirouette - 116203, Rose Red - 108613
DSP - Paper Stacks - Regals - 130139
Embossing Folder - Perfect Polka Dots - 117335
Punches - 1/4" Stitched Grosgrain - Whisper White - 126877
Accessories - Snail Adhesive - 104332, Stampin' Dimensionals - 104430, Basic Rhinestones - 119246

 
Tutorial for you to create your own card
 
 
Don't forget to pop on over to Sunny Challenges & Creations & check out what the other girls have created.  We always love seeing your creations. 
  •  To order Stampin' Up! products online, please Shop Here
  • Want to join my family, and be a part of a group that loves to stamp together, Join Here
  • To check out available classes or to attend any of the classes, please Click Here, click on the "Classes/Workshop" Page or email me vickiawright@bigpond.com
Until next time, Happy Stampin'
 
Vicky

Sunday, 22 September 2013

Cupboard....

... Stampin' Up! style.
 
This is another card I cased from Pinterest.  Thank you Michelle for your inspiration.  The ladies at Crafty Creations loved it!  Mind you it is now quiet some time we created it!

This card makes for heaps of possibilities with some of the ladies creating the card aimed at babies, kids & in general.  It would perfect for the teenager too!
  
Supplies –
Stamp Set            Happiest Birthday Wishes (Retired)
Ink                           Pretty in Pink (Retired), Crumb Cake - 126975
Cardstock             Very Vanilla - 106550, Chocolate Chip - 108599
Ribbon                   Natural Trim – 129287, Pretty in Pink (Retired)
Embossing Folder Fancy Fan – 127751
Punches                 Decorative Label - 120907
Accessories           Big Shot - 113439, Snail Adhesive – 104332, SU Sponge - 101610, Pearls - 119247

Front - 
 
 Cupboards Closed - 


Tutorial to create your Cupboard
 
  •  To order Stampin' Up! products online, please Shop Here
  • Want to join my family, and be a part of a group that loves to stamp together, Join Here
  • To check out available classes or to attend any of the classes, please Click Here, click on the "Classes/Workshop" Page or email me vickiawright@bigpond.com
Until next time, Happy Stampin'

 Vicky

Sunday, 14 July 2013

Feeling Sentimental....

...  for a Baby Girl's Card.  I love the clean crisp look of this card.

This is one of my cards I created for The Handmade Expo a couple of months ago.  In fact, it is proving to be one of my popular Baby Cards, probably because it is so different & has the clean look about it.  I've had so many comments about it that one lady brought 3 of them.  Mind you, I don't create a lot of the same cards, but this is one card that I tend to re-create, usually in different colours.

Today's card is for a Baby Girl.  I will post the others in a couple of days time.

 
Your Tutorial for you to create your own card


Until next time, Happy Stampin'
 

Tuesday, 11 June 2013

MDS....

Inside Card...
Yahooooooo, I have finally managed to use MDS for a card - little though it is, I did it!!!!!!!

I have played with it over the weeks since purchasing it & I must say I LOVE it.  I don't know if I will use it that much but hey it is a start & who knows what I will create in the future.  For the moment I am quiet happy with myself with what I created.

I've been creating Baby Cards for The Handmade Expo the last couple of weeks as this is one sort of card I seem to sell a lot of.  I don't know what it is about them that seems so popular but the public love them.  Maybe it is the clean look as I like to keep my Baby Cards mainly White with just a little bit of colour.

I cannot take the credit for my card today as I found it on Google, so please if you recognise it, let me know as I would love to give you the credit for your beautiful card.  I did change the colours a little.

Not only did I manage to use MDS but also the stamp set "Pennant Parade" which has been sitting on my shelf gathering dust.  I also used my new EF - Houndstooth.  I wasn't too sure if I would like this folder, but I have to say "YES".................. AND can see myself using it on lots of things.

 
Supplies -
Stamp Set              Pennant Parade - 122742
MDS                         Word Play – Certainly Celery
Cardstock              Whisper White - 106549, Bashful Blue – 106565,
Certainly Celery - 108619
DSP                          Subtles Designer Series – 117152
Embossing Folder Houndstooth - 123134
Punches                 Scallop Oval – 119856, Oval – 119855, Petite Pennants Builder – 122361,
                                Small Star (Retired)
Ribbon                   ¼” Grosgrain – Bashful Blue (Retired)
Accessories           Big Shot - 113439, Snail Adhesive – 104332, Rhinestones – 119246,
                                Stampin’ Dimensionals - 104430
Click on the click below to print & save your own instructions to create this card
 

  •  To order Stampin' Up! products online, please Shop Here
  • Want to join my family, and be a part of a group that loves to stamp together, Join Here
  • To check out available classes or to attend any of the classes, please Click Here, click on the "Classes/Workshop" Page or email me vickiawright@bigpond.com
Until next time, Enjoy
 
Vicky

Tuesday, 22 May 2012

Boys ....

Overalls were a huge hit the other day at the Community Centre.  We had a lot of fun creating these & everyone of them turned out so very different.

I've seen these around the blog world & in magazines, so thought I would have a go myself.  Mind you, I started from scratch and didn't go by a pattern or template. 

Supplies -
Stamp Set - Hoppy for You (Retired) - but I had to use it, as this card was screaming for it!!!!
Ink - Whisper White, Chocolate Chip, Lucky Limeade
Cardstock - Whisper White, Pacific Point
Accessories - Stampin' Dimensionals, Snail Adhesive, White Gel Pen
Non-SU - Buttons

Sorry it is only a short post as I am on the way out the door for my day at the centre & as usual running late.


Happy Stampin'


Sunday, 20 November 2011

SC 017/11...

My card for this week's challenge over at Sunny Challenges & Creations is back to the basics & a very simple, easy card!

Gwen set the challenge this week & along with the sketch, a "Nursery Theme" was added!  Now, we all need baby cards sometime during the year, so what better way to begin the new year with adding this type of cards to your stash.  Don't forget to head on over to  Gwen & Kris's blogs to check out what they have created.

Measurements -
Base Card - Whisper White - 11 1/4" x 4 1/4" or 29cm x 10.5cm
Layer 2 - Whisper White - 4 1/4" x 1 1/2" or 10.5cm x 3.5cm
 
Inside...
I run my smaller piece of Whisper White Cardstock through my Bigshot using Embossing Folder - Perfect Polka Dots.  I punched 2 strips of Pink Pirouette Cardstock using the Pinking Heart Border Punch & adhered once piece on either side of the embossed Whisper White piece.  This piece was then adhered to the Base Card - Whisper White - using Snail Adhesive.
 
I stamped my image onto a scrap piece of Whisper White Cardstock using Pink Pirouette Ink.  Cut the oval with my Bigshot & the Ovals Dies.  I again punched a long strip of Pink Pirouette with the Pinking Heart Border Punch & carefully adhered around the oval to form a border.  This piece was adhered to the card using SU Dimensionals.

For my greeting, I stamped onto another scrap of Whisper White Cardstock using Early Expresso Ink, punched with my Word Window Punch, adhered to a piece of Pink Pirouette Cardstock which had been punched with the Modern Label Punch & adhered to the Base Card using SU Dimensionals.

Supplies -
Stamp Set - Fox & Friends, Short & Sweet
Ink - Early Expresso, Pink Pirouette
Cardstock - Whisper White, Early Expresso, Pink Pirouette
Punches - Pinking Hearts Border, Word Window, Modern Label
Dies - Ovals
Accessories - Snail Adhesive, SU Dimensionals


Don't forget to link your creation back to Mr Linky at Sunny Challenges & Creations   You could be the next Ray of Sunshine.

 Until next time, Enjoy!


Thursday, 18 August 2011

SC 003/11...

This is my 2nd card for the challenge over at Sunny Challenges & Creations Why not head over there & have a go, while at the same time, use that stamp set "Fox & Friends" which may not have seen ink for some time.

This is the great thing about the challenge or as someone described it "Double-Sword" where as you have a sketch to work by as well as a particular stamp set!

All my measurements may be found Here...

Using the Scallop Border Punch, I punched both pieces of Real Red Carstock & adhered them to both ends of the DSP.  I punched a random number of colour circles in Baja Breeze, Pear Pizzazz, Real Red & Pacific Point Cardstocks using the different size Circle Punches & adhered them randomly to Whisper White.  This piece was then embossed using the Square Lattice Embossing Folder & adhered to Pacific Point, then to the DSP & finally the base card.  Are you stick of this folder yet?  I'm sure not!

Inside Card...

I run a piece of Pear Pizzazz Ribbon across the card, followed by a piece of Real Red to the centre of the Pear Pizzazz.  I stamped the turtle image onto a scrap piece of Whisper White Cardstock & punched using my Circle Punch, adhered to a punched piece of Baja Breeze, then to the Scalloped Circle of Chocolate Chip & finally over the top of the ribbons.  I stamped another image using Pear Pizzaz, cut his shell out & applied to the brown image using SU Dimensionals

I inked small white dots around the Scalloped Chocolate Chip Circle using my White Gel Pen.

For my greeting/sentiment, I stamped it onto a piece of Whisper White Cardstock using Chocolate Chip Ink punched using the Word Window Punch, adhered to a piece of Baja Breeze which had been punched using the Modern Label Punch & adhered to the card.

I've just realised that I used a hell of a lot of punches, but I think doing it this way can sometimes bring a whole new look to a card.


Supplies -
Stamp Set - Fox & Friends, Short & Sweet
Ink - Chocolate Chip, Pear Pizzazz
Cardstock - Pacific Point, Pear Pizzazz, Baja Breeze, Whisper White, Real Red
 DSP - Celebrations
Punches - Scallop Edge Border, Scallop Circle, 1/2" Circle, 3/4" Circle, 1 1/4" Circle,
1 3/8" Circle, 1 3/4" Circle, Modern Label Extra-Large, Word Window
Embossing Folder - Square Lattice
Ribbon - 1/2" Stitched-Poly - Pear Pizzazz, 1/4" Grosgrain - Real Red
Accessories - SU Dimensionals, Snail Adhesive

Until next time, Enjoy!

Sunday, 14 August 2011

SC 003/11...

Okey Dokey, this will be our third week for the challenge over at Sunny Challenges & Creations and it is going far better than we ever hoped!  If you haven't seen the challenge, why not head over & see for yourself.

This week, I had to provide the sketch & stamp set to use.  I chose Fox & Friends!

Base Card - Pretty in Pink - 5 7/8" x 4 1/4" or 15cm x 10.5cm
Layer 1 - Rose Red - 4 1/4" x 1" or 10.5cm x 2.5cm
Layer 2 - DSP - 4" x 4 1/4" or 10cm x 10.5cm
Layer 3 - Rose Red - 3 1/2" x 2 1/2" or 9cm x 6.5cm
Layer 4 - Very Vanilla - 3 3/8" x 2 3/8" or 8.5cm x 6cm
Layer 5 - Rose Red - 1/2" x 4 1/4" or 1.5cm x 10.5cm
Layer 6 - Ribbon

I adhered Rose Red top & bottom to the DSP.  I stamped my images randomly & direct onto Very Vanilla Cardstock using Rose Red, Pretty in Pink & Soft Suede Inks.  I wanted to bring another colour into the card & browns always work well with pinks, although I didn't want a strong brown, so Soft Suede Ink worked perfectly.

 I adhered Very Vanilla to Rose Red & then to the DSP.  I adhered my Ribbon to the small piece of Rose Red, tied a knot & adhered to the DSP.  This whole piece was then applied to the Base Card.

I stamped my sentiment using Soft Suede Ink, punched it out using the Modern Label Punch, swiped Pretty in Pink around the edges & adhered to the card using SU Dimensionals.

All in all a lovely card for a baby girl!

Supplies -
Stamp Set - Fox & Friends, Short & Sweet
Ink - Rose Red, Pretty in Pink, Soft Suede
Cardstock - Very Vanilla, Rose Red, Pretty in Pink
DSP - Sweet & Sour Speciality
Punches - Extra-Large Modern Label
Ribbon - 3/8" Taffeta - Very Vanilla
Accessories - Snail Glue, SU Dimensionals


If you would like to play along, then head over there & submit your creation.  It is very easy, just follow Mr Linky instructions.

Until next time, Enjoy!

LinkWithin

Related Posts Plugin for WordPress, Blogger...