Tuesday, 30 August 2011

FREE Pass...

Before I get onto sharing today's card with you, I just want to let you know that I have a FREE pass to the next round of Stampin' Fun & Friends which begins 20 September through to 4 October.

As the theme for this round is Autumn Artistry, all you have to do is leave a comment saying why you like Autumn.

Now, I know here in OZ we are only a few days off Spring, but there is something I remember about an autumn when living in Canberra many years ago.  That is all those beatuiful leaves falling off the many trees in & around the parks & gardens onto the ground & myself & my girlfriend diving into them, playing & hiding.  I had never seen anything like it.  The memory is still very strong in my mind!

I will be using random.org to draw the winner.  Closing date is 9 September.

On with the card -

With Father's Day coming up here in OZ, we created a card last Friday which could be used for this occasion.  In fact, the card suits all occasions.  I found the instructions on the very talented Connie Babbert's site.  I did change the measurememnts to suit my card & to make it smaller.

Base Card - More Mustard - 5 7/8" x 4 1/4" or 15cm x 10.5cm
Layer 1 - Pear Pizzazz - 5 3/4" x 3 1/2" or 14.5cm x 9cm
Layer 2 - DSP - 5 3/4" x 3/4" or 14.5cm x 2cm
Layer 3 - DSP - 5 7/8" x 1" or 15cm x 2.5cm
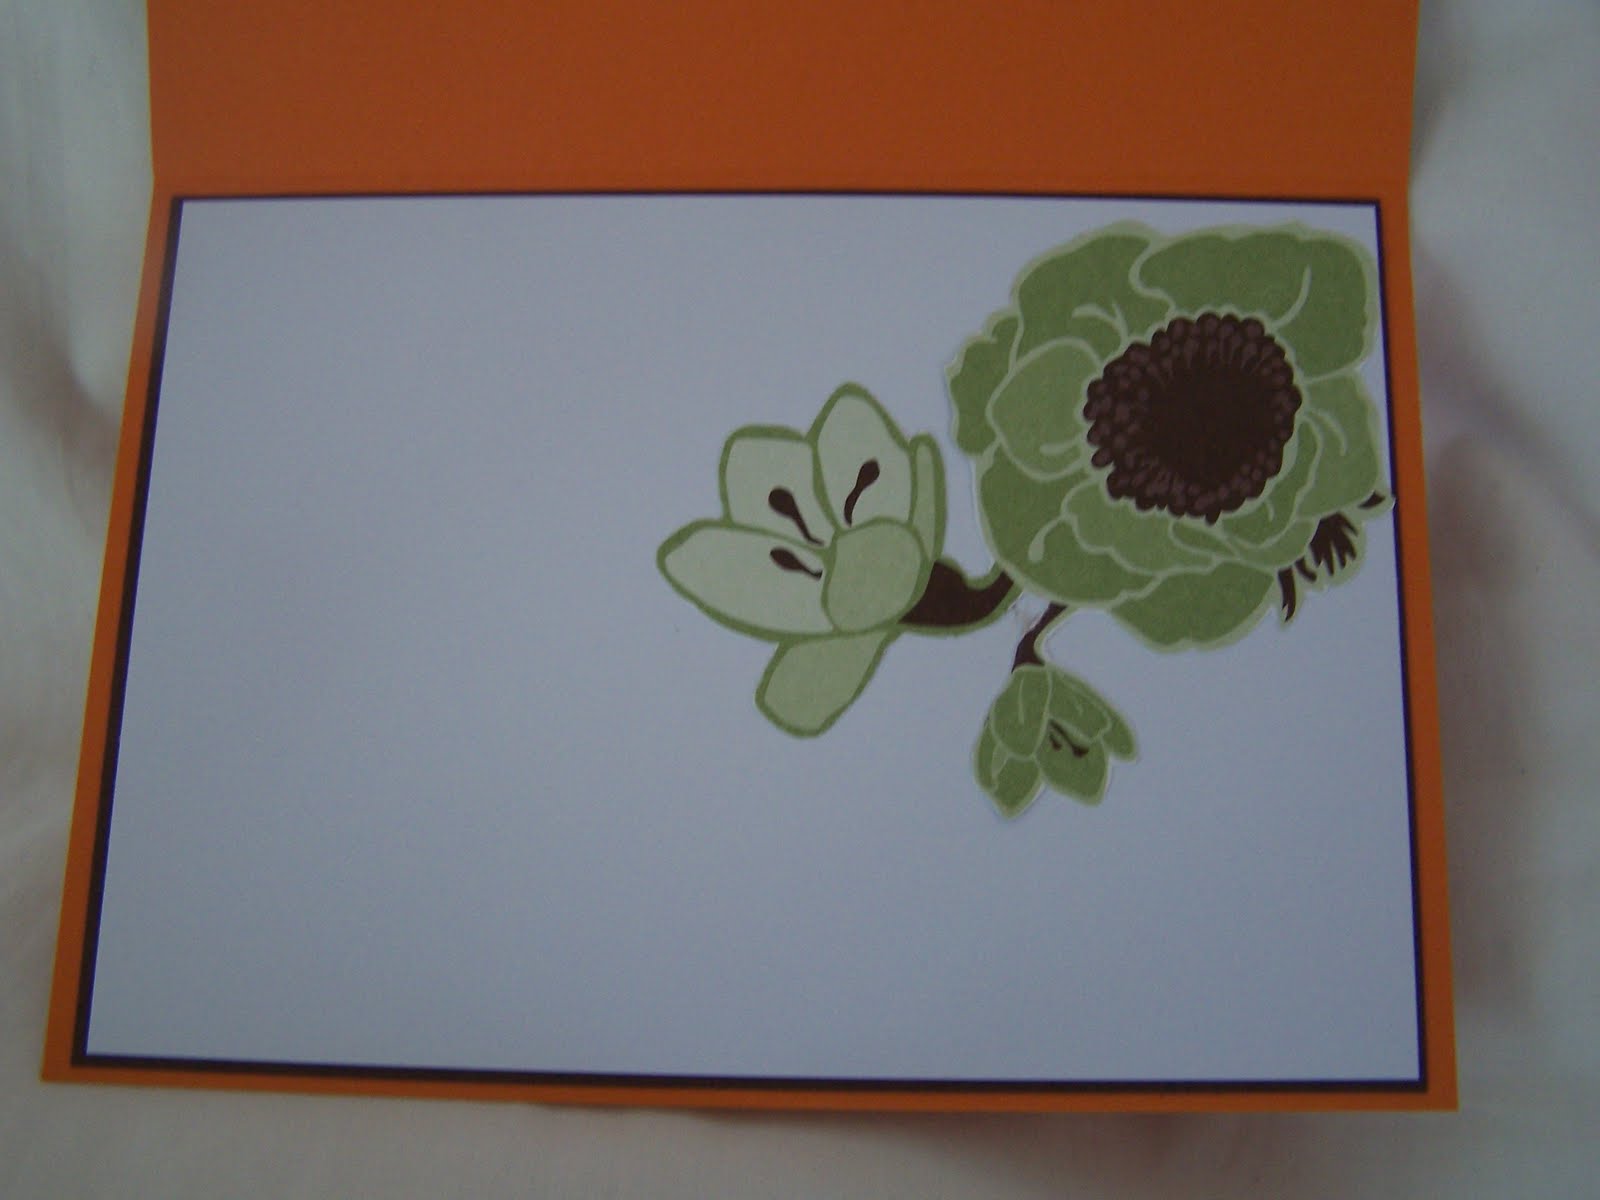
Inside Card...
After scoring my Base Card at 4 1/2" or 11.5cm, I adhered the wider piece of DSP down the RHS of the card - as per inside photo.

I adhered the narrower piece of DSP down the LHS of Pear Pizzazz Cardstock, stamped the image using Pear Pizzazz Ink at the top of the card & adhered to the Base Card using Snail Adhesive.  I wanted the tie to look like it was hanging off a hook.

After making my Tie using DSP, I attached it to the top of the card with Snail Adhesive.  I inked my sentiment in Basic Black Ink & stamped at an angle to the tie direct onto the Pear Pizzazz piece.

For my inside, I stamped the images around the edge of Whisper White Cardstock using Pear Pizzazz & adhered to the Base Card.

All in all, a really fast & very easy 5 minute card!

Supplies -
Stamp Set - Totally Tool, Short & Sweet, Cheers to You
Ink - Pear Pizzazz, Basic Black
Cardstock - Whisper White, Pear Pizzazz, More Mustard
DSP - In Colours
Accessories - Snail Adhesive


Until next time, Enjoy!

Monday, 29 August 2011

SC 005/11..

Kris has set the challenge for this week over at Sunny Challenges & Creations with the only stipulation we use Marina Mist.  Now, this is a beautiful colour, one that I do not use very often, and one I find it very hard to work with!  I don't know why, but all the creations I've seen that have Marina Mist in them are just lovely.

To help me with my sample, I went straight to my Colour Coach - fantastic SU Tool & one I would not be able to survive without!

Base Card - Crajun Craze - 5 7/8" x 4 1/8" or 15cm x 10.5cm - once scored in half
Layer 1 - Crumb Cake - 5 3/4" x 4" or 14.5cm x 10cm
Layer 2 - Whisper White - 5 5/8" x 3 7/7" or 14cm x 9.5cm

I run the Whisper White through the Bigshot using the Embossing Folder - Petals a Plenty ensuring that I only emboss half the card.  Using Old Olive Ink, I stamped my images over the top half of Whisper White - the part not embossed.  I then coloured the images using my SU Markers of Bashful Blue first & then Marina Mist.  I wan't too worried about going out of the lines or how rough I coloured the images, as I think this set calls for colouring to be random.  I stamped a image onto a scrap of Whisper White, coloured it in & cut around the image to adhere to the card once completed.

The Whisper White piece was adhered to the piece of Crumb Cake.  A piece of Taffeta 1/8" Ribbon was adhered across the centre & to the back of Crumb Cake.  This piece was then adhered to the Base Card - Cajun Craze.

I stamped the sentiment onto a piece of Whisper White using Marina Mist, punched it using the Window Word Punch & adhered to a piece of Cajun Craze which had been punched using the Modern Label Punch.  I adhered this to the bottom RHS of the card.  The cut out image was then adhered to the card & over another stamped image using SU Dimensionals.  To finidh the card & to give it a little bit of a lift, I applied Rhinestones to the centres of the flowers.


Supplies -
Stamp Set - Short & Sweet, Fast & Fabulous
Ink - Marina Mist, Old Olive
Cardstock - Whisper White, Crumb Cake, Cajun Craze, Marina Mist
Ribbon - 1/8" Taffeta - Marina Mist
Embossing Folder - Petals a Plenty
Punches - Modern Label, Window Word
Accessories - SU Dimensionals, Basic Jewels, Bigshot, Snail Adhesive

Why not pop over to Sunny Challenges & Creations to see what Kris  & Gwen  have created & have a go at the challenge yourself.  We would love to see your creations.

Until next time, Enjoy!

Wednesday, 24 August 2011

SSC 217...

I am in the middle of doing Wedding Reception Stationery so shouldn't really be doing any cards, let along attempt sketches, but while the paint is drying, the mouse will play.  Anyhow, I have to make the bride & groom a "Congratulations" Card, so this is a good excuse!

This card has been created for the challenge over at Stamping 411 I finally inked a stamp set which has been sitting on my shelf for a little time now.  After seeing it in ink, I now have a million ideas to use it, but alas as it is a Hotess Set, so will be retiring at the end of the month.

This week Stamping 411 not only have 2 sketches but they have a "Contest" so to speak.  The winner will receive a FREE Level 3 Hostess Set from the previous Idea Book & Catalogue - "Playful Pieces". 

If I get the time, I will attempt to have a go at the other sketch too, as a few ideas popped into my head while making the card for #2 sketch

As always, measurements have been supplied for us -

Base: 11 x 4 1/4", scored and folded in half at 5 1/2" - Basic Black
Layer 2: 5 x 3 3/4"  - Riding Hood Red
Layer 3: 4 7/8" x 3 5/8"  - DSP
Layer 4: 3 1/8" x 4 1/8" - Basic Black
Layer 5: 3x4" - Very Vanilla
Layer 6: Ribbon or cardstock
Layer 7: ANY shape punch

I stamped my images direct onto Very Vanilla Cardstock using Basic Black Ink.  Thinking I would try something a little different & not do the 2-step stamping technique onto the image, I coloured the images using my Aqua Painter, Riding Hood Red & Crumb Cake Inks.  I think it come out ok.  I very roughly coloured the images, as I think the stamp set calls for that, not to keep your colouring within the lines, so to speak!

I put the card through the Bigshot using Embossing Folder - Perfect Polka Dots, layered it to Basic Black, then to DSP & then to Riding Hood Red Cardstock.  A piece of Ribbon was adhered across the bottom about 1/4 way up & a bow tied.

I stamped my sentiment using Basic Black Ink onto Very Vanilla, punched using Oval Punch & run it through the Bigshot, again using the same Embossing Folder.  The piece was then adhered to a piece of Crumb Cake Cardstock which had been punched using the Scallop Oval Punch.  I adhered to the card using SU Dimensionals.

The whole piece was then adhered to the Base Card - Basic Black.

For my inside, I did the 2-Step Stamping Technique using Basic Black, Riding Hood Red & Crumb Cake Inks onto Very Vanilla, adhered to layer of Riding Hood Red Cardstock & then to the Base Card.

What looks like a hard sketch, is really a great one to do!


Supplies -
Stamp Set - Fast & Fabulous, Oval All
Inks - Basic Black, Riding Hood Red, Crumb Cake
Cardstock - Very Vanilla, Crumb Cake, Riding Hood Red, Blasic Black
DSP - Love Letter
Embossing Folder - Perfect Polka Dots
Punches - Oval, Scallop Oval
Ribbon - 1/8" Taffeta - Basic Black
Accessories - SU Dimensionals, Bigshot, Snail Adhesive, Aqua Painter

Until next time, Enjoy!


Tuesday, 23 August 2011

Stampin' Fun & Friends...


Can you believe it?  The lovely CherylAnn has asked me, ME if I would be a guest designer in her next round of "Stampin' Fun & Friends".  Well, of course I said a big "YES" but not before asking if "She had the right person".

How it works -
There will be 15 projects in 15 days with step by step tutorials that are able to br printed & saved.  How cool is that!  All projects have the theme "Autumn"

Early Bird Registration is happening now!
If you register by 10th September, cost is $15.00. 
After this date, Registration is $17.50.

To register, please click on Here & you will be taken direct to CheryAnn's blog.  Once there, click on her  LH side bar where it says "Early Bird Registration ends soon" & the Paypal Button.  It's right at the top, so you can't miss it!

I hope you will be able to join myself & the other designers for this great event!


Sunday, 21 August 2011

SC 004/11...

Wow!  My pre-order of new "stuff" arrived yesterday!  I am really speechless as to how lovely it all is.  I really can't choose a favourite, only to say they all are.  Now as for the new book - wait until you lay your hands on that.  I promise, you won't be able to put it down.  I know I am going to have to win Lotto, as I WANT  & MUST have everything NOW!  I couldn't wait to use something & this challenge was crying out for some to be used on it.

It's a really fun challenge this week over at Sunny Challenges & Creations... The challenge was set by Gwen which included not only a sketch, but we had to do some embossing & a Christmas Theme.  Well, this got me thinking & after receiving my pre-order goodies, I wanted to use the gorgeous new ribbon coming out September 1.  I also wanted to do something in non-traditional colours which is what I like for Christmas - a something a little different! 

So, my card is based around the ribbon & my non-traditional colours.

The challenge -
Go by the Sketch
Embossing
Christmas Theme

Base Card - Pink Pirouette - 4 7/8" x 4 1/8" or 15cm x 10.5cm - once folded & scored in half
Layer 1 - Early Expresso - 4 3/4" x 4" or 14.5cm x 10cm
Layer 2 (Top) - Whisper White - 2 3/4" x 1 7/8" x 2 or 9.5cm x 4.7cm x 2
Layer 3 (Bottom) - Whisper White - 1 3/4 " x 3 7/8" or 4.5cm x 9.5cm
Layer 4 - Early Expresso - Oval
Layer 5 - Pink Pirouette - Oval
Layer 6 - Ribbon

Inside -
Using Early Expresso Ink, I stamped off once, then stamped directly onto the Whisper White & then repeated again but not re-inking my image.  I wanted the faded images in the background.  This piece was adhered to the base card - Pink Pirouette.

I've been playing with my Shimmer Paint of late & experimenting all different ways of using it.  Amazing the results you can achieve!!!!

Oval -
I stamped my Dasher - so so so pleased he didn't retire - image onto Pink Pirouette Cardstock using Versamark & heat embossed using Clear Embossing Powder.  I then grabbed my jar of Frost White Shimmer Paint - gotta love this stuff - a SU Dauber & spread the paint all over the piece of cardstock.  I wiped all the frosted paint off Dasher using a tissue.  This also shines your cardstock a little too.

I then used the same SU Dauber & Paint, except this time applying direct to the stamp itself.  I stamped this image directly over "Dasher", used my tissue to wipe all the paint off my embossed image & around the piece of cardstock.

Layers -
I run this piece of Pink Pirouette Cardstock through the Bigshot using my Ovals Die.  It doesn't matter that only part images appear on the completed oval - think it looks better this way.  I repeated again except using a piece of Early Expresso Cardstock & adhered the Pink Pirouette to the Early Expresso.  I adhered a couple of Basic Jewels to his antlers.

I run my 2 pieces of Whisper White Cardstock through the Bigshot using one of my favourite embossing folders - Petals a Plenty.  Oh what the hell, they are all my favourites!  While I still had my good ol' Shimmer Paint & SU Dauber, I randomly spread Shimmer over the raised section of the embossing.  I wanted the flowers to stand out a little more!  I repeated the same for the bottom piece of Whisper White.

I adhered all these pieces of Whisper White to the Early Expresso Cardstock & run a piece of the new gorgeous Chocolate Chip Ribbon across where the top & bottom meet & tied a bow-tie.

For my greeting, I again stamped the tree image using my SU Dauber & Shimmer Paint onto a scrap piece of Whisper White, stamped the sentiment using Early Expresso Ink over the top, punched using the Word Window Punch & adhered to a piece of Pink Pirouette Cardstock which had been punched using the Modern Label Extra-Large Punch.  This was the adhered to the base card.

My oval was adhered to the base card using SU Dimensionals.  I didn't want it to be lost in the embossing & shimmer paint.

I think I may have pulled off the look I was hoping for!

Supplies -
Stamp Set - Dasher, Short & Sweet, Lovely as a Tree
Ink - Early Expresso, Versamark
Cardstock - Pink Pirouette, Early Expresso, Whisper White
Punches - Word Window, Modern Label Extra-Large
Ribbon - 1/2" Scallop Dots - Chocolate Chip
Embossing Folders - Petals a Plenty
Dies - Ovals
Accessories - Shimmer Paint - Frost, Basic Jewels, Embossing Powder - Clear, SU Daubers, SU Dimensionals, Snail Adhesive, Heat Tool, Embossing Buddy


To try the challenge out for yourself, why not head over to Sunny Challenges & Creations... & have a go!
While over there, see what Gwen & Kris have created!

Until next time, Enjoy!

Saturday, 20 August 2011

More Mustard....

...is the colour I started out with, but somehow ended up working with the colours below.  These are not colours that I usually work with, but I think, just maybe, have pulled it off!

I also sat down to make the card for tomorrow's class, along with a technique to go with it, but as usual I got a bit side tracked when I went looking for a layout. 

While looking, I come across this great sketch form Sketch Frenzy Friday, had the stamp set out on my desk which I was going to use for another challenge & started on this card.  It is so easy for me to become side tracked, especially when playing with colours, sketches & of course our wonderful stamps, etc.

Base Card - Basic Black - 5 7/8" x 4 1/8" or 15cm x 10.5cm when scored in half
Layer 1 - Tempting Turquoise - 5 3/4" x 4" or 14.5cm x 10cm
Layer 2 - Basic Black - 5 5/8" x 3 7/8" or 14cm x 9.5cm
Layer 3 - Tempting Turquoise - 4 5/8" x 2 5/8" or 11.5cm x 6.5cm
Layer 4 - Whisper White - 4 1/2" x 2 1/2" or 11cm x 6cm
Layer 5 - Basic Black - 7/8" x 2 5/8" or 2.2cm x 6.5cm
Layer 6 - Whisper White - 3/4" x 2 1/2" or 1.9cm x 6cm

Wow, I didn't realise there were that many layers until I measured them all up!

Using my good ol' faithful Embossing Folder - Square Lattice, I run it through the Bigshot, adhered to the Tempting Turquoise Cardstock & then to the Base Card - Basic Black.

 I stamped my image onto Whisper White using Tempting Turquoise Ink, stamped a couple of flowers onto the Whisper White using Basic Black Ink & adhered to Tempting Turquoise Cardstock.  I adhered this to the embossed piece of Basic Black using SU Dimensionals, as I didn't want this piece to get lost in the embossing & the black.

I stamped my sentiment onto Whisper White Cardstock using Basic Black Ink, stamped another flower with Tempting Turquoise Ink beside the sentiment & adhered to the Tempting Turquoise piece.  This whole piece was adhered off centre to the middle piece.  Using the reverse ink colours gives it a little more of an interesting effect!

I adhered Basic Pearls to the centre of the Basic Black flowers, which I coloured a Basic Rhinestone with a permanent black marker & stuck it to the centre of the Tempting Turquoise flower.

For the inside, I reversed the inks again, while stamping onto Whisper White Cardstock, adhered to Tempting Turquoise & then to the base card.


Supplies -
Stamp Set - Short & Sweet, Baroque Motifs
Ink - Basic Black, Tempting Turquoise
Cardstock - Whisper White, Tempting Turquoise, Basic Black
Embossing Folder - Square Lattice
Accessories - SU Dimensionals, Basic Jewels, Basic Rhinestones, Bigshot, Snail Glue

 Until next time, Enjoy!

Friday, 19 August 2011

Something...

Inside...
... which started out being created first & then by the card which was posted yesterday.  I wanted them to match in with each other, but not use the same DSP, if this makes sense!

I've created both the card & Notebook for a birthday, so hopefully she won't come onto my blog until later on in the week or even Saturday.  It is for one of the ladies who attends Craft Creations at the Community Centre in Caloundra.

Once I had worked out my measurements & score lines, this was quiet a easy project to put together. 

Measurements -
Inside -
Base Layer - Pear Pizzazz - 2 7/8" x 2" - Score at 1 1/4" & 1 1/2"
Layer 1 - DSP - 2 3/4" x 1 3/4"

Outside -
Folder - Pumpkin Pie - 8" W x 7 7/8" H - Scored at 2 1/4", 2 1/2", 5 1/2" & 5 3/4"
Layer 1 - DSP - 2 x pieces - 7 3/4" x 2 1/8", 1 x piece - 7 3/4" x 2 7/8"

Inside -
I adhered the DSP over the Pear Pizzazz & stuck it to the top of the notebook, ensuring that part of the cardstock went over onto the back. 

Using Inks of Pumpkin Pie, Baja Breeze & Pear Pizzazz, I randomly stamped images on all pages of the notebook, just to give it a finished look & to tie it altogether.  The stamped images were stamped off once so that Naomi is still able to write over the top of them.


Close Up...
 Outside -
After scoring the folder, I adhered the pieces of DSP to the top of Pumpkin Pie Cardstock, leaving a small edge showing all around the folder.  I tied a piece of Pear Pizzaz Ribbon right around the LHS of the folder & tied a Bow-Tie towards the top of the card & off centre.  I typed "Naomi" onto a pice of Whisper White Cardstock, stamped part of images onto the Whisper White & adhered to a piece of DSP using SU Dimensionals.  The piece of DSP had been punched using Scallop Oval Punch.  

To hold it together I will use a velcro dot of which I will have to purchase prior to wrapping.


Supplies -
Stamp Set - Friends Never Fade
Ink - Baja Breeze, Pear Pizzazz, Pumpkin Pie
Cardstock - Pumpkin Pie, Whisper White, Pear Pizzazz
Punches - Scallop Oval Punch
Ribbon - 1/2" Stitched-Poly - Pear Pizzazz
Accessories -  Snail Glue, SU Dimensionals
Non-SU - Velcro Dots


Until next time, Enjoy!

Thursday, 18 August 2011

SC 003/11...

This is my 2nd card for the challenge over at Sunny Challenges & Creations Why not head over there & have a go, while at the same time, use that stamp set "Fox & Friends" which may not have seen ink for some time.

This is the great thing about the challenge or as someone described it "Double-Sword" where as you have a sketch to work by as well as a particular stamp set!

All my measurements may be found Here...

Using the Scallop Border Punch, I punched both pieces of Real Red Carstock & adhered them to both ends of the DSP.  I punched a random number of colour circles in Baja Breeze, Pear Pizzazz, Real Red & Pacific Point Cardstocks using the different size Circle Punches & adhered them randomly to Whisper White.  This piece was then embossed using the Square Lattice Embossing Folder & adhered to Pacific Point, then to the DSP & finally the base card.  Are you stick of this folder yet?  I'm sure not!

Inside Card...

I run a piece of Pear Pizzazz Ribbon across the card, followed by a piece of Real Red to the centre of the Pear Pizzazz.  I stamped the turtle image onto a scrap piece of Whisper White Cardstock & punched using my Circle Punch, adhered to a punched piece of Baja Breeze, then to the Scalloped Circle of Chocolate Chip & finally over the top of the ribbons.  I stamped another image using Pear Pizzaz, cut his shell out & applied to the brown image using SU Dimensionals

I inked small white dots around the Scalloped Chocolate Chip Circle using my White Gel Pen.

For my greeting/sentiment, I stamped it onto a piece of Whisper White Cardstock using Chocolate Chip Ink punched using the Word Window Punch, adhered to a piece of Baja Breeze which had been punched using the Modern Label Punch & adhered to the card.

I've just realised that I used a hell of a lot of punches, but I think doing it this way can sometimes bring a whole new look to a card.


Supplies -
Stamp Set - Fox & Friends, Short & Sweet
Ink - Chocolate Chip, Pear Pizzazz
Cardstock - Pacific Point, Pear Pizzazz, Baja Breeze, Whisper White, Real Red
 DSP - Celebrations
Punches - Scallop Edge Border, Scallop Circle, 1/2" Circle, 3/4" Circle, 1 1/4" Circle,
1 3/8" Circle, 1 3/4" Circle, Modern Label Extra-Large, Word Window
Embossing Folder - Square Lattice
Ribbon - 1/2" Stitched-Poly - Pear Pizzazz, 1/4" Grosgrain - Real Red
Accessories - SU Dimensionals, Snail Adhesive

Until next time, Enjoy!

SSC 216...

Another sketch, another card, except this time I have created a matching "something" to go with the card.  In fact, the matching "something" was created first & the card created to match the "something".  Sorry folks, the "something" won't be posted until tmw.

The card has been created from the sketch at Stamping 411  Such a great & very easy sketch.  Countless possibilities for this sketch.  Of course the best thing about the sketch from Stamping 411 - Measurements are provided -

Base Layer: 11 x 4 1/4", scored and folded in half at 5 1/2" - Pumpkin Pie

Layer 2: 5 x 3 3/4"  - Pear Pizzazz
Layer 3: 4 7/8" x 3 5/8"  - DSP
Layers 4 & 5: 1/2" x 4 inch strip of paper - DSP
Layer 6:  Note, you can use ANY shape on this layer! - DSP

Inside Card
Inside Card -
As I had already cut a couple of different colours & shapes of flowers which I was going to use for the front of the card, I decided instead to use one for the inside.  I applied adhesive to the back of the flower, adhered to Whisper White Cardstock, then to a piece of Chocolate Chip before adhering to the Base Card.  I think it gives it a little bit of a different look.


Close up of Flowers

Card -
I cut my 3 strips using DSP & adhered them to Pear Pizzaz Cardstock as per the sketch.  Prior to this piece being run through the Bigshot using Embossing Folder Square Lattice, I stamped my sentiment direct onto the Pear Pizzazz using Pumpkin Pie Ink.  Again, with the Square Lattice.  Sorry folks, I can't seem to get enough of this folder.  It just seems to finish your cards off & gives them that little extra omph!

Pear Pizzazz was ahered to a piece of Chocolatecar Chip & then to the Base Card - Pumpkin Pie.  I took the liberty & added an extra layer to my card. 


Envelope
 For my shape, I cut 3 flowers from the DSP & adhered them to the card, using SU Dimensionals on the front 2, while adhering the background one direct to the card.  It sort of gave it a better look & more depth doing it this way.   Again, I strayed from the "master plan" a little in that I added 3 shapes, instead of the 1.

I applied a little glue to the middle of each flower with my glue pen & poured Dazzling Diamonds on top.  It immediately lifted the whole card.  Gotta love the Dazzling Diamonds.


Envelope -
I just cut a piece of DSP & adhered to the LHS side of the card.  Again, no stamps!

As I was taking the photo, I suddenly realised I hadn't used any stamps on this card, except for the greeting.  Just goes to show that you don't have a lot of products to create a really effective card!

Something else which crossed my mind - what a great way to use up the little bits of DSP that we can't bare to toss out!


Supplies -
Stamp Set - Well Scripted
Ink - Pumpkin Pie
Cardstock - Whisper White, Pumpkin Pie, Chocolate Chip, Pear Pizzazz
DSP - Greenhouse Gala
Embossing Folder - Square Lattice
Accessories - 2-Way Glue Stick, Snail Adhesive, Bigshot, SU Dimensionals, Dazzling Diamonds

Until tmw, when I will post the "something".  Enjoy!


Monday, 15 August 2011

CCMC 162...

The jury is still out on this card, but thought I would use a stamp set which hasn't been out of its box for some time, & give it a little bit of ink.

I've taken the sketch from Create with Connie & Mary which looked a great easy sketch until I blocked myself into a corner & out come the colour-coach.  I then re-did a couple of colours as I wasn't too happy with the original take on it.  This is the first time I have done a sketch from here, but they are always have great sketches.

Base Card - Not Quite Navy - 5 7/8" x 4 1/4" or 15cm x 10.5cm - ie once it has been scored in half
Layer 1 - Crumb Cake - 5 3/4" x 4" or 14.5cm x 10cm
Layer 2 - DSP - 4" x 1" or 10cm x 2.5cm
Layer 3 - Ribbon
Layer 4 - Not Quite Navy - Large Circle
Layer 5 - Very Vanilla - Smaller Circle

I coloured my ribbon with Crumb Cake Re-Inker & set aside to dry.

Inside Card...

Using Crumb Cake Ink I stamped my image randomly onto the Crumb Cake Cardstock, adhered the DSP to the top of the Crumb Cake.  I wanted to make it look like bubbles coming up from the bottom of the ocean.  I made a mask of the Seahorse from scrap paper & cut it out.  I stamped the seahorse image onto Very Vanilla Cardstock using Garden Green Ink, I attached the mask over the top of the seahorse, using another image & Garden Green Ink, I stamped off twice before stamping over the mask.  I repeated again.  I then inked my image again using Not Quite Navy Ink & stamped over the top twice.

I cut my 2 circles using the Circles Die, adhered the Very Vanilla circle to the Not Quiet Navy Circle & then to the Cumb Cake Piece.  I then ran the ribbon across the middle where the 2 pieces met & tied a bow off-centre.  Using SU Dimensionals, I adhered the whole piece to the Base Card.

With Envelope...

I stamped 3 shell images onto Very Vanilla Cardstock using Baja Breeze & cut them out.  These were applied to the card as per the sketch with the back one being adhered direct to the card while the front 2 were adhered using SU Dimensionals - gotta love these SU Dimensionals.

I repeated my masking for the inside of my card, adhered the Very Vanilla straight to the base card.  The masking was again repeated for my envelope.

Supplies -
Stamp Set - Ocean Commotion, Circle Circus
Ink - baja Breeze, Garden Green, Not Quite Navy
Cardstock - Crumb Cake, Not Quite Navy, Very Vanilla
DSP - Elegant Soiree
Ribbon - 3/8 Taffeta - Whisper White
Dies - Circles #2
Accessories - Snail Glue, Bigshot, Re-Inker - Crumb Cake, SU Dimensionals


Until next time, Enjoy! 

Sunday, 14 August 2011

SC 003/11...

Okey Dokey, this will be our third week for the challenge over at Sunny Challenges & Creations and it is going far better than we ever hoped!  If you haven't seen the challenge, why not head over & see for yourself.

This week, I had to provide the sketch & stamp set to use.  I chose Fox & Friends!

Base Card - Pretty in Pink - 5 7/8" x 4 1/4" or 15cm x 10.5cm
Layer 1 - Rose Red - 4 1/4" x 1" or 10.5cm x 2.5cm
Layer 2 - DSP - 4" x 4 1/4" or 10cm x 10.5cm
Layer 3 - Rose Red - 3 1/2" x 2 1/2" or 9cm x 6.5cm
Layer 4 - Very Vanilla - 3 3/8" x 2 3/8" or 8.5cm x 6cm
Layer 5 - Rose Red - 1/2" x 4 1/4" or 1.5cm x 10.5cm
Layer 6 - Ribbon

I adhered Rose Red top & bottom to the DSP.  I stamped my images randomly & direct onto Very Vanilla Cardstock using Rose Red, Pretty in Pink & Soft Suede Inks.  I wanted to bring another colour into the card & browns always work well with pinks, although I didn't want a strong brown, so Soft Suede Ink worked perfectly.

 I adhered Very Vanilla to Rose Red & then to the DSP.  I adhered my Ribbon to the small piece of Rose Red, tied a knot & adhered to the DSP.  This whole piece was then applied to the Base Card.

I stamped my sentiment using Soft Suede Ink, punched it out using the Modern Label Punch, swiped Pretty in Pink around the edges & adhered to the card using SU Dimensionals.

All in all a lovely card for a baby girl!

Supplies -
Stamp Set - Fox & Friends, Short & Sweet
Ink - Rose Red, Pretty in Pink, Soft Suede
Cardstock - Very Vanilla, Rose Red, Pretty in Pink
DSP - Sweet & Sour Speciality
Punches - Extra-Large Modern Label
Ribbon - 3/8" Taffeta - Very Vanilla
Accessories - Snail Glue, SU Dimensionals


If you would like to play along, then head over there & submit your creation.  It is very easy, just follow Mr Linky instructions.

Until next time, Enjoy!

LinkWithin

Related Posts Plugin for WordPress, Blogger...